How To Create Surreal Collage Style Artwork in Adobe Photoshop
bhadra 0 Comments Photoshop
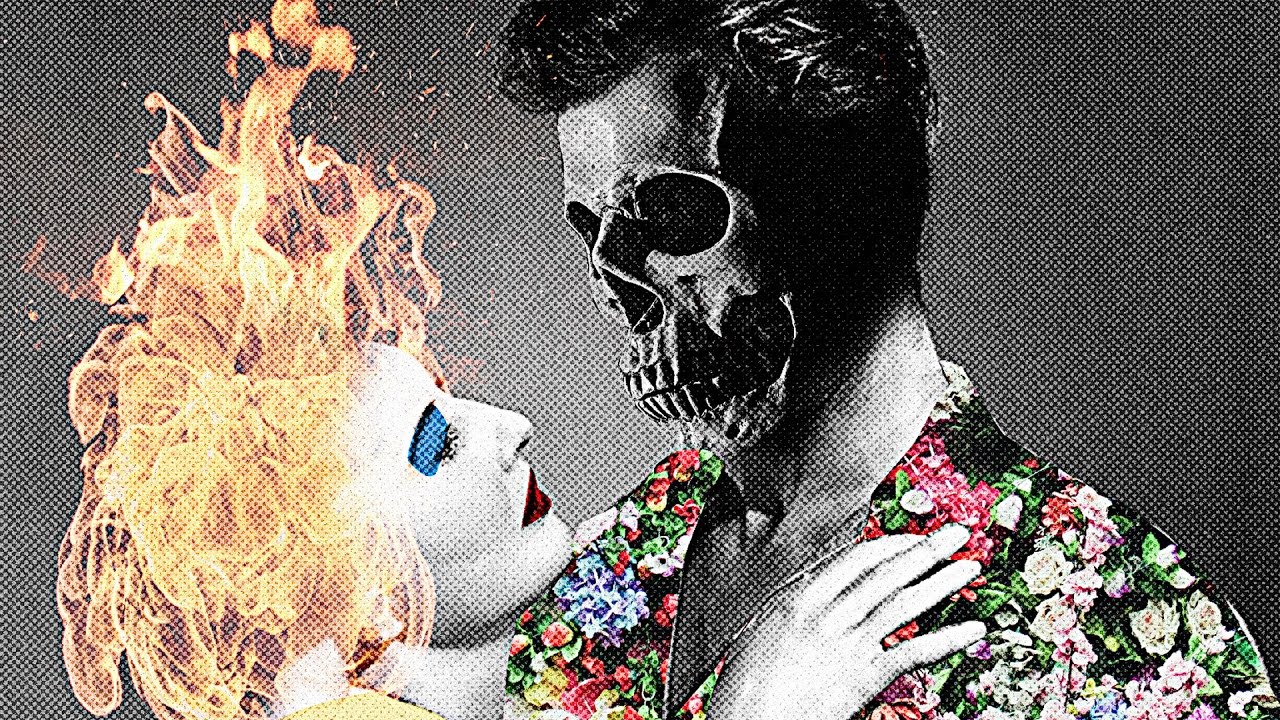
Today we’re gonna have loads of fun creating an abstract and quite surreal collage style piece of artwork in Adobe Photoshop this kind of art style has been popular for years although originally it would have been made using traditional photo montage techniques with photographs and magazine images and newspaper clippings all cut apart and we assembled using scissors glue and photocopies these days you can use digital techniques to make things without even getting our hands dirty plus there’s a wealth of source material readily available in the form of stock imagery so we can pick and choose from if you bear with Google or Pinterest for some example of surreal collages you’ll see there’s literally no limits to what you can produce I personally love those ones with the comical outcomes they’re made with completely random combinations but it’s Photoshop tutorial will use a selection of free stock images along with basic Photoshop compositing techniques to create a fun abstract piece of artwork traditional artists sometimes use paints or pastels to add color to their work to also do the same with pixels than to mimic the analog reproduction methods originally used will distress the result with some effects that mimic bad photocopy prints with high noise and harsh contrast you’ll find all the images I used linked in the description area below so download them to follow along and create this weird love scene between a school faced man in a flowery shirt and a lady whose head is on fire the first source image is a photograph of Barbara Stanwyck and Ralph Meeker a public domain image originally from Wikimedia Commons will combine this with a skull to open them both in the bill with Photoshop use the pencil to trace around the outline of the skull staying a few pixels within the edge to avoid capture in any of the black background in the selection click and drag each point and extend the Bezier handles to create smooth curves so angular corners give the point in extra click to remove the Bezier handle which allows you to set more acute curves once you’ve reached the starting point and close the path right click and choose make selections hit command + C or ctrl + C on Windows to copy then paste the clipping into the main human scale and rotate the skull gruffly in place then hit enter to apply the changes reduce the opacity of the last 80% so you can see the original subjects head underneath then hit command + C to transform and scale and position the score more accurately negative to go to image adjustments and desaturate to remove the subtle green color in add a layer mask so the skull layer and use the pencil to draw a selection around any excess overlap that need to move in fill this area with black within the mask to effectively raise it use a soft brush to erase the school where overlaps with the subject hair painting with black will erase the artwork or painting with white within a mask will restore it activate the actual artwork rather than the mask by clicking the layer thumbnail on the left within the layers panel you know the paint over any unwanted details in the shadowy areas with a black brush the edge between the skull and the neck can be blended using a soft brush within the layer mask the result doesn’t have to be perfect since the distortions will add later will help disguise anybody photoshopping in order to set the woman’s hair on fire we first need to quickly remove the existing perm draw a rough selection using the polygonal lasso tool then go to edit and fill choose content aware from the drop-down menu and let Photoshop do the best calculation it can the rest of the hair can be removed with some sloppy clone stamping choose a soft brush and then all and click a sample of the gray background paint around the remaining areas to delete what’s left once again the result it has to be perfect since the messiness will be disguised later on open the first fire image in Photoshop and copy and paste it into the working document set the blending mode to screen to render the black background transparent and press command + T to transform scale rotate and position the flames into place where the original hairstyle was aiming to cover as much of the obvious clone stamping as possible based in the second flame image set the blending mode to screen and position this version to overlap the first set of flames now the second image is a hard bottom edge so add a layer mask to blend it in using a soft brush so the next step we need to make a selection of the guy’s shirt create a new layer and trace around the outline using the pencil and to stay fairly accurate but don’t worry about making a precise selection remember that originally collages will cry out using craft knives and scissors so a rough selection actually adds to the aesthetic of this style of art right click and choose make selection for each segment of the shirt outline and fill the area with black on the new layer using the OL and backspace shortcut when you don’t open up the flowers photograph and paste it into the working document hold the Alt key and click between this flowers layer and the shirt shapes layer below it to make a clipping mask then hit command + T and scale the image to size one more simple addition to the composition is to stick an eyeball over the watch face on the man’s arm use the elliptical marquee tool to make a selection holding the Alt key to start from the center and shift to make it a perfect circle copy and paste it into the main document and scale it to size add a new layer and use the pencil to trace around each character’s clothing fill the selections with a color of your choice and change the blending mode to multiply we can use the same process to add some comical makeup to the lady’s face draw selections around the eyes and the mouth and fill them with blue and red on GRP with your collage go to select and all followed by edit and copy merged create a new document and pasted in this duplicate of the artwork go to filter noise and add noise and configure the settings to 5 percent Gaussian and monochromatic and head to filter sharpen and smart sharpen change these settings to 100 percent amount and 10 pixel radius select all and copy then switch back to the main document and paste this distressed version at the top of the last like sort back over to the duplicate again to add a further effect this time go to image mode and greyscale and select yes to flatten the image then head back to image mode and choose bitmap choose halftone screen under the method drop-down at the frequency of 10 and angle of 45 degrees and the shape of round in the following options copy and paste this half to an effect on to the main artwork and change the blending mode to soft light so I’d more distressed print effects the final result is a surreal piece of collage art that would make the basis of a fantastic big poster unique album cover or just a fun art print in itself we’ve got fun with this tutorial.
Posted in Photoshop


