Photoshop Tutorial: Puppet Warp!
bhadra 0 Comments Photoshop
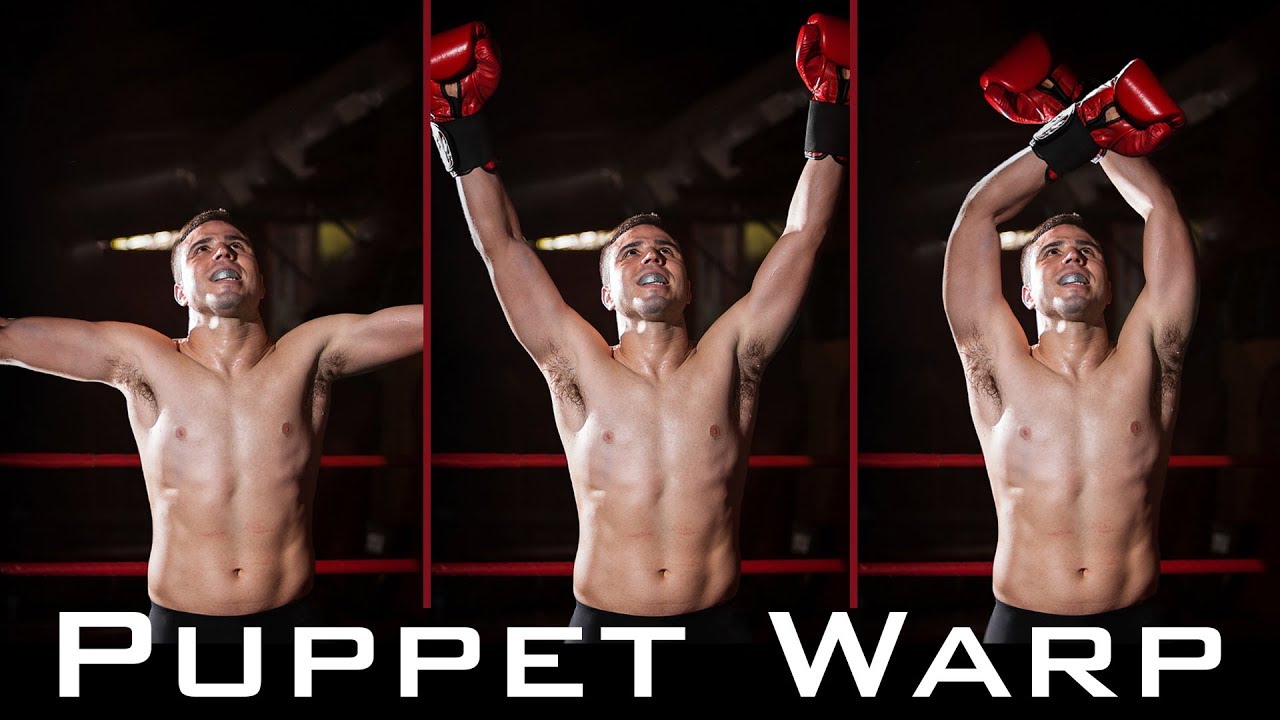
I’m going to tell you how to use the Photoshop’s Puppet Warp function that enables you to manipulate and deform a form swiftly and effectively. Open a image youâd like to use. I downloaded this one from Shutterstock.Com. I’ve prepped the photograph by means of chopping out the determine over the heritage. I did this utilising the speedy selection software and then, content-aware Fill to exchange the heritage pixels. Iâve carried out in-depth tutorials on these systems, so I receivedât be going over them right here. With the figure selected, go to Edit and “Puppet Warp”. I will click “exhibit Mesh” to show you ways Puppet Warp analyzes the image and creates a series of interlocked triangles to create a mesh.
I ordinarily like to increase this to “extra aspects” for a finer transformation. I’m going to cut down the growth to “zero” to make the mesh hug the shape we will warp. Letâs click off âexhibit Meshâ, so we can higher see the determine below it. Now, we are going to add pins to outline the warp. The pins act as anchors or hinges. To demonstrate this, i will click on the neck and on the navel. When I drag from the navel, it rotates the determine from the point on the neck. I will undo the last step by pressing Ctrl or Cmd + Z. With the aid of clicking on the neck factor to make it lively and dragging it, the determine rotates from the navel. I’ll undo this step, as well. Should you convey your cursor just about an anchor point and press and maintain Alt or option, you’ll see a circle define surrounding the point. When you rotate the circle, your form can even rotate established around that anchor factor. You could additionally hinder part of your form from relocating while you rotate or drag an additional area. On this illustration, if I do not need his head to move as I rotate the arm, Iâll undo the final step and click on on the highest of his head to anchor
Now, when I click on the shoulder point to make it active and rotate it, his head does not transfer. Iâll make an anchor factor on the inside of the arm and rotate it. I will bring the opposite arm round to show you one other function of Puppet Warp. Correct now, the proper wrist is over the left wrist. If i want the other wrist to be in entrance, i will click on this icon, so that you can set the active pin back or at the back of the opposite wrist. The other icon sets the pin forward or in entrance. To receive the warp, click this check-mark or press Enter or Return.
Posted in Photoshop


