Sky Replacement Photoshop CC Tutorial
bhadra 0 Comments Photoshop
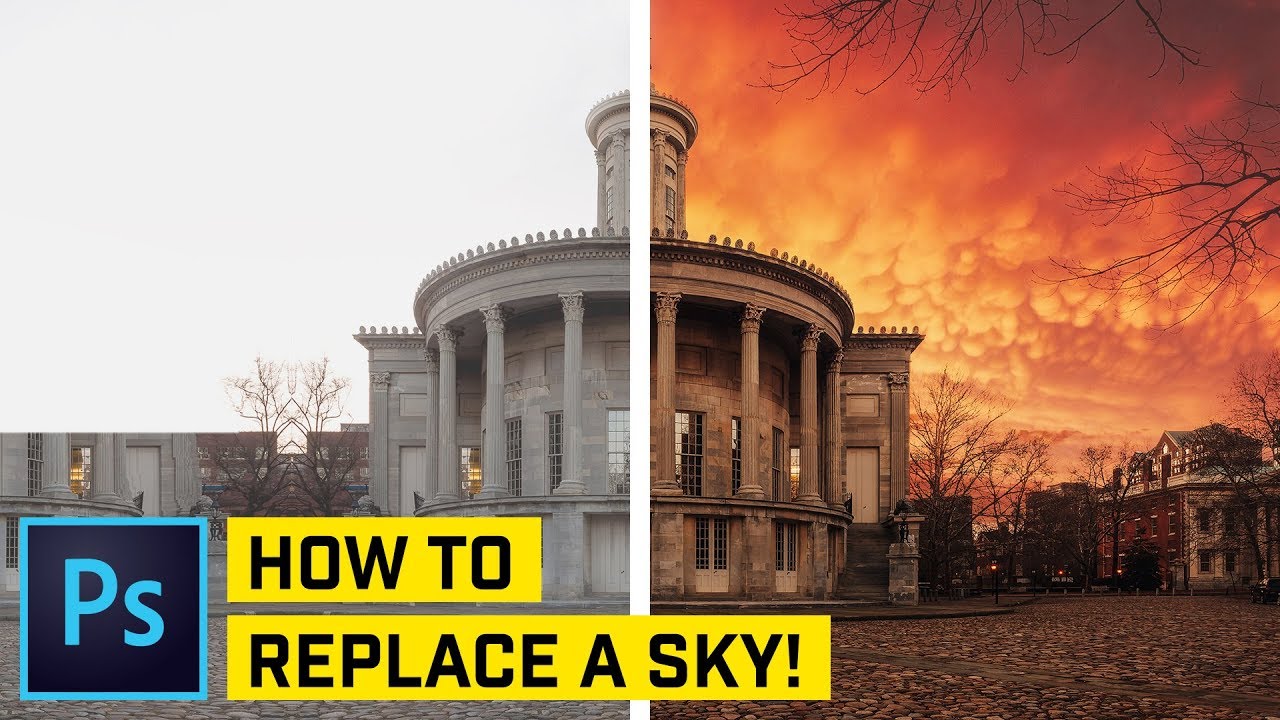
Today we’re going to take a look at performing a sky replacement. Check this out! (dramatic noise) Yeah, it’s a little bit of a dramatic effect. Maybe a little bit too dramatic. But the principles kind of stand across the board. And maybe you can make your photo look a little bit more beautiful than mine did. Certainly a little less, dare I say, over-processed. We’re going to take a look at how to do all of that, and more, in this Adobe Photoshop tutorial. Now, if you enjoy the video, just make sure you go ahead and subscribe to YouTube channel so you never miss any Photoshop tutorials in the future. And, if you really enjoy the video, consider picking up a copy of my Photoshop course – boom! A link appeared right up there! It’s all about how to retouch images in Photoshop, you might really like it.
You might not, but hey – it’s worth giving a shot. You can click the link and check it out, and you may find that it just – eh, is something that helps up your game in Photoshop a little bit. Ugh, I’m talking too much, let’s get into Photoshop and get this thing started. Alrighty, well here we are in Adobe Photoshop, and this is the photo to which I want to add the sky. And this is the sky that I want to add to it. This is actually from a clouds pack that Joey L was offering years ago. I want to say, like, 2010. Looking around, I realized I still had them on my hard drive, and I don’t know that I’ve ever used them for anything. But they’re some really great photos, it’s not his fault that I haven’t used them. It’s mine. Now, this photo of this building here – part of the thing that is going to help us here, is the fact that there is pretty good contrast between the sky and the foreground elements.
Even these trees and things. But obviously, we need a relatively complex selection because of all the tree bits and all the edges of the building. So what we’re going to try to do, is begin with a channel base selection. I’m going to jump into my channels panel over here. And I’m going to look for whatever makes the sky kind of the brightest, and the foreground kind of the darkest. I think that’s the blue channel. I’m going to drag the blue channel down, and drop it on the new channel layer. And before I do much of anything, I’m going to open up levels and just boost the contrast by going Image>Adjustments>Levels, and I’m going to say, yeah, push the black up. And then I’ll say, get over here, and push the white up. I’m just looking to make sure I don’t lose too much of tree branches.
If I lose a little bit of them, that’s fine. But I don’t want to lose too much. And I’m just going to darken up the foreground kind of as much as I can without making the edges look too crunchy. And then what I’m going to do is I’m going to grab the lasso tool, and just make very rough selection around this. I sped up the creation of that there, so as not to bore you. What I was doing was just trying to get a very rough selection, but leaving a little bit of buffer there. So you can see all the really detailed stuff, I didn’t touch that, I kind of just made a – you could say a loose selection around the entire foreground, right? Even here through these buildings, I didn’t mess around with the trees, we’ll take care of them later.
I’m just looking to get the stuff that, yeah, everything within this selection should be solid black. So now that I know that, I’m going to go Edit>Fill, and I’m going to say, you know what? Fill Contents, solid black, boom, hit OK. And then we can go select, deselect. Now, obviously, we’ve got the bulk of our mask here – you know, created filled with black, but these edges are still not solid black. So we need to do something about that. And the sky still kind of looks like it’s light grayish, and we want that to be white. Everything else in the foreground, including these sticks and tree branches, we want all that stuff to be black. So, what I’ll do, I’ll come over here and grab the brush tool, and I’m going to set the blend mode of the brush tool – now, this is not of the layer or anything like that – this is the blend mode of the brush tool. I’m going to set it to soft light. Going to leave the opacity at 100%, the flow also at 100%. And I’m going to come over here, I’ll make the brush size itself a little smaller.
In fact, I’m just going to use my square bracket keys to do that. Eh, I’ll knock it down to about 300, or so. I want to make sure that I’m painting with my foreground colors set to black, you see that right there? Black. And what this is going to do, is, as I paint – and it’ll correct this error here, I’m going to hit OK. What we need to do is come back to layers, make sure we select our layer, right? It turns – whoa, what happened? Everything turned back on. That’s fine, turn this channel back on. Select the channel, shut off the composite RGB channel, and now, because this layer is selected, it’s going to work for us. Check this out. How ridiculous is that? Now because this brush is set to soft light, look at what it’s doing. It’s just painting in black the edges that I’m running over. Look at that. Isn’t that amazing? We’re getting a nice, exact, precise edge, we don’t – and I’m just painting over very roughly. But because soft light is only attacking pixels that are very similar to it, we’re getting a beautifully, nearly perfect selection.
And you can see, look at that, it just picks out all of the details, great. I can brush over the trees a little bit. I probably don’t want to brush over the trees too much, though, if I’m being honest. Because they tend to carry a lot of matting through with them, and you’ll see what the matting issue is in a second, because we’re going to have a little matting. We could come into the trees up here, but again, I just want to be careful of the sky, and the stuff around it. I’ll hit the trees a little bit. And then I think what we’ll do here, is I’m going to set my brush mode back to normal. I’m going to grab the move tool, so I’m not distracted with this giant brush. And I’m once again going to go Image>Adjustments>Levels. And I’m just going to push the white point up a little bit here.
Just to really make sure the sky is just totally, 100% solid white, and I’m going to hit OK. And I think now we have a great selection of our sky. And you may be thinking, great selection? What are you talking about? This is a black and white – what in the world is going on? Well, if I CTRL+CLICK this, you’re going to see here that, sure enough, we have made a really complex selection here of the sky. Including all this crazy detail here around the trees. And stuff is feathered, and just matched and meshed in perfectly. Now, the one thing we’re going to have to look out for is, some of the sky does peak through the window there.
So, we’re probably going to have to go in manually, and paint the sky in. That’s fine. We know we’re going to have to deal with that, and we will when we get to it. Now, if you have an image where using a channel based selection is just not working out for you – I’m going to select my RGB composite channel again – you can use the quick selection tool, you could drag a selection over the sky, and do this whole game. And then you could take it into select mask. I did a super rough selection, by the way. You could take it into this, and you could use your refine edge brush tool, and you could go ahead and brush over the tree, and try to brush up, and touch up the edges here of your mask, and eh – you know what? I’ve got to say it’s actually working out a little bit better than I thought it would. Yeah, I kind of dig it there when we let go, that’s a pretty nice selection.
That was pretty quick too. Maybe faster than my channel based selection. This is mainly just to show, you’ve got multiple options here in what you do. Maybe I’ll output this as a new layer, with layer mask, I’m not going to try decontaminating the edges, or really any of the global refinements. Although there are some really powerful things you can do with smooth, and feather, and contrast. Even shifting the edge – maybe we’ll shift the edge a little bit, I lied. We’ll shift the edge just a little bit, -7%. I’m going to hit OK. And we’ve got this new layer with layer mask here. Obviously, it’s just showing the sky. That’s easily enough rectified by just selecting the mask, and hitting CMD/CTRL+I, that’s going to then hide the sky, and of course, the thing to do would be drop the sky in behind this. Before we do that though, I’m going to bring up the original one, we’re going to go with my channel based selection first. Because, it’s what I – what I was planning on using, to be honest. So one thing that I should say here is, that if the sky is a bit different than the color and, like, overall brightness of your photo – like, this photo is much brighter than the sky we’re adding.
You’re going to end up layering on a lot of different effects, like we’re going to do here. Which is not an ideal situation. Not – certainly not if you want to get a really realistic looking photo. So the key is going to be to shoot a sky in very similar weather, or maybe not even weather, but very similar lighting conditions – time of day, stuff like that – to the photo that you’re adding the sky to. So just to show you how important this can be, I’m going to drag this sky into our other image. I’m going to grab my move tool, I’m going to drag this over, we’re going to drop it in place. It’s going to say a different bit depth, that’s fine, I don’t care about that. I’m going to zoom out here, and what we’ll do here is, we’ll make this a little bit smaller maybe.
And we’ll push it up, maybe something right about there. Something like that could be cool. We’ll commit that change. And now I just need to add a mask to this sky layer. So if I go to my channels, I CMD/CTRL+CLICK on this channel thumbnail, see I’ve got that great selection? And then all I need to do is come down here and hit my new layer icon, boom! We’ve masked the sky into place. Now, notice the nasty kind of matting, crunchy look around everything. There’s a little bit of that white edge. Just for the sake of the argument, let’s duplicate this layer, let’s see what it looks like. I haven’t even tested this out. Let’s just see what it looks like. I’m going to delete the layer mask, I don’t want to keep it.
Let’s see what this looks like if we use the mask that we created with select a mask. So I’m going to CTRL+CLICK this, that is, the layer mask. I’m select – I’ve got the sky layer selected. Once again, we’re going to hit new layer, but this time the selected area is the whole foreground, we actually want the sky to disappear from there. So we want – we want the mask to be filled with black in the foreground like we’ve been doing. And right now the foreground is the selection. So to create a mask, but fill the selection with black instead of white, hold down the ALT/OPT key and click add a new layer mask.
And you can see, even with select a mask, we still have that kind of crunchiness in the sky. Which one looks better? Which one looks worse? Ooh, I don’t know, I think the channel based selection might look a little bit better around the trees. I don’t know – I might be splitting hairs though, it’s really close. Anyway, I’m going to delete that. Let’s stop being distracted by that. For this layer, for the first sky layer, what I’m going to do is I’m going to unlink it from the masks. See unlink? And now what I can do, is I can drag it around, kind of in the sky and position it exactly as I want it to be. Maybe something kind of like that. And really, before I go any further. There are a few things we can do, we can select our mask, I can zoom in, be like, yeah, you know what? All this really light stuff around these branches, I kind of want to get rid of that. So what I would do is grab my brush tool.
Once more, we’d set it back to the soft light blend mode. Now here, we want to paint in the mask – we want to paint white. Because we want the sky – the layer that we’re hiding parts of – we want it to kind of almost cover the edges, just the very edges of these sticks and branches and stuff. Just to take away that really strong, lit edge. So, I’m going to make sure I set my foreground color here to white. And we could try painting over this and see what we get.
So you can see here, the more I paint over it, the more I’m making it go away. It’s almost making the branches themselves look like they’re disappearing. So, I’d probably use this effect, eh, somewhat sparingly – er, not really effect, but technique – somewhat sparingly. At least for this image. Some images it’s going to work really, really well. But I’ll still kind of cool everything off just a little bit, just by going over it. And same for the trees down here, it wont hurt. And it’s not going to hurt anything that we already have set in place. The other thing that I want to do, is I want to zoom in here on my layer mask.
And make sure I take care of my windows here. Now, the windows on the – on sort of the sides of this torrent on top here, you can’t really see the sky other than the reflection, and the reflection is really bright, but that would be a matter of probably dodging and burning. Adding a little color effect right to those edges. In this case, I just want to get the obvious bit of bright sky in there. I want to knock that out, and just get my – get my nice orange sky to peak through. So I’m going to grab my brush tool again. We’ll set our blend mode back to normal, and I’m going to use my square bracket keys, the left square bracket key in particular. And I’m going to just size down my brush and then go ahead and paint away all of these little squares.
And I’ve just sped the video up here, just so you don’t have to painstakingly agonize over watching me do this. And we can get on with our lives here. And I can zoom back away from that, and eh, I think that – that’s close enough to working for us. I think that’ll work. So now that we have all this stuff set, we can select our sky, and just reduce the opacity to about, eh, something like 75%, we’re just laying down sort of the base of our clouds. Now, I’m going to duplicate this layer. CMD/CTRL+J, and I’m going to set this layer to screen blend mode. Now this part of the process, where I’m mixing these blend modes, this is going to depend on a few things. Number one, the brightness level of your existing photo.
Also, the brightness level of the clouds that you’re pasting into the existing photo. And, the result that you want to get. So maybe, if it’s just too bright. And you’re looking to actually darken things up, you could go with something like the multiply blend mode. You could go with kind of an extreme effect with color and contrast, by pumping some hard light into there. You could go right to a soft light blend mode, you’re just kind of infusing a little bit of contrast. Now that just really doesn’t look good for this photo. I’m going to stick with screen. But just now, play around with your blend modes in there. There’s a lot that they can do for you. Now I can duplicate this layer. By the way, do you see this little, like, line going around the edge? There might be just one pixel, or half pixel, that we need to correct here.
So, I’ve got the brush tool here, I’ve got the blend mode set back to normal. I’m going to shut off the top layer for a quick second, and select the mask here on our underlying, our 75% opacity layer. And I’m just going to click once, hold down SHIFT, and click all the way up here – yeah, you can see that just takes that line right away. I’ll click another time, and I’ll click out to here, and then I’ll just go through gently, kind of across here. And just try to get rid of that line, as best I can. Something like that. If you see any kind of little, like annoying stuff like that, you probably want to clean it up earlier rather than later. It’ll be nice and now, of course, we already have this layer mask already duplicated with the layer that we duplicated. So you can just hold down ALT/OPT, and duplicate kind of the corrected layer mask up.
Hold down ALT/OPT, drag that layer mask up, and it’s just going to replace it, voila! Just like that. Now, we’re going to hit CMD/CTRL+J, duplicate this layer. We’re going to set this to the blend mode soft light. And I’m going to boost the opacity back to 100%. So you can see we kind of have this extreme, colorful sky effect. And the foreground is not necessarily what I would consider colorful.
So, we need – this is where we need to layer on some effects, and help kind of bring everything together for us. Now, we could do a lot of boosting and vibrance and curves adjustments to the foreground, but I’m going to go for more – a more heavily stylized effect, that’s a little more punch-you-in-the-face. But, one of the things I’m noticing is what looks like some, some fringing up here around the clock tower. Yeah, you can see we have a bit of fringing up there.
So let’s try to – let’s try to correct this here real quick. I’m going to come back to my original mask, I’m going to grab the brush tool, and this is where it’s just a labor of love. I’ll probably go with the blend mode of soft light. And I’m going to paint with white, and yeah, you can see for sure. When I go in there, I can clean that stuff right up. So, I’m going to real quick just spend a minute cleaning this up, in fact, you’ll probably see me just speeding through this. But this is, again, where – you know, take the time to get a nice selection and clean that channel up.
Get rid of your fringing. And it’s just going to give you a much more realistic look overall, that you’ll be more pleased with, your clients will be more pleased with. And just, when everybody’s happy – everyone’s happy. And not everything has to be pixel perfect, it’s just kind of, take out the noticeable stuff. Most people aren’t going to be pixel peeping your photo, and saying, “Oh, you messed this little bit up right there. That looks awful!” And so on and so forth. Alright, now we will duplicate this layer mask up. ALT/OPT, clicking and dragging to both of our layers in front. Just like that. And this is where the beauty of your underlying, just, normal, reduced opacity layer comes into play. For some of these difficult edges, where we’re still seeing that strong white edge, this is where you would just take the brush. Not even a soft light blend mode, normal blend mode. And probably an opacity of around, I wanna say 50 or so.
You would just go over some of these – paint with white, so you’re painting in the sky. Whoop – make sure you have the layer mask selected. And paint the sky, just right over some of these edges. It’s just going to help blend the images together a little bit, it’s going to add the color of the sky to the edges of the your branches. And that’s alright, because when you’re looking at branches like this, they’re almost semi-opaque just by their very nature. So, when you’re just coming in here and mixing some of that color with them, it’s kind of alright. I’m going to add a little bit of orange that’s kind of flaring through the top of the clock tower. Not the most realistic bit of orange coming through there. But it serves our purposes for now.
And really, we could still – you can see that edge still really needs to be cleaned up a little bit more. We could spend a lot of time, it’s a very, very complex edge. But I don’t want to spend all day just working on this selection. Let’s get to finishing up the toning here, finishing up this effect. We’ve covered a few different ways now to work on the masks and selections and channels, and select a mask. And there’s a lot of ways to create great selections in Photoshop. I’m going to delete the top layer here, and let’s get to work on this.
So, I’m going to select all three of the sky layers, by SHIFT+CLICKing, click the top one, SHIFT+CLICK the bottom one. Hit CMD/CTRL+G, we can call this “sky.” So now of course, we can see there’s before, there’s after. Really, it starts to change the mood a little bit, right? The brightness in these windows might be a little bit too much, the brightness in these windows might be a little bit too much – that’s all stuff that needs to be adjusted. But for now, let’s go ahead and add a hue saturation layer, and we’re going to clip it to this layer group. So the hue saturation is going to affect these three sky layers. Clip it by hitting CMD+OPT+G, that would be CTRL+ALT+G on the PC. And I’m just going to set the overall saturation to like, -25 or so. So we’re really going to pull some life out of the sky, again, we’re trying to help it match a little bit the foreground. A little bit more than it is now. Then we’re going to go ahead and add a levels adjustment here, and what I’m going to do – I’m going to seek to get rid of some contrast overall, so I’m going to set my output levels to around 31, let’s say.
And the input levels around 225-ish. And maybe I’ll shift the midtone point here to like 1.05, you can see we’re really, really killing contrast. We’re adding a very little bit of brightness, but mainly killing off a ton of contrast. Then I’m going to go ahead and use a lookup table, a color lookup table adjustment layer. I’m going to load a 3D lut file, I’m going to use one of the defaults.
I’m going to go with edgyamber.3dl, this is a very orange look. I’ll go ahead and set this to the layer blend mode of soft light, and then I’ll just reduce the opacity a bit. So here’s where you can reduce the opacity as much, or as little, as you want. Maybe I’ll bring this down to, I don’t know, 50-75%. I’ll probably roll with 50, something like that right now looks pretty good. And now to infuse a little more contrast, we’ll do this the easy way. Just add a levels adjustment layer. Set it to the blend mode soft light. And then just reduce opacity until it kind of looks good again, so maybe right around 65-70%. There’s before, there’s after. Now I have to say, harping on the whole selection issue again, this is where any bad selections in the branches, you can see that light edges really coming out. This light edge here, on the side of the tern. Up on the top of the torrent, the lookout tower area is really coming out. The semi-opaqueness of these orange, little nodes sticking up, that’s really coming out.
This is where it’s just important to get a nice selection. The nicer the selection, the nicer your final finished effect is going to be. But this should be something where you would go over each of these little nodes and make sure they’re perfectly selected with the brush tool, after creating your general selection with select a mask. Especially if this is something you’re doing for a client, of course! And now what we’re going to do to apply some nice global overall adjustments, is we’re going to use the camera raw editor.
So I’m going to merge all layers to a new layer, CMD+SHIFT+OPT+E, that would be CTRL+SHIFT+ALT+E on the PC, there it is. I’m gonna say – I’m going to call this “grade,” and I’m going to right click on this, and choose to convert it to a smart object. This’ll just allow me to come in and edit and adjust my grading and toning later on, any time I want. Next, we’ll go Filter>Camera Raw Filter, and after this bad boy opens up in camera raw, I’ve got a bunch of presets over here that a buddy of mine made, I’m going to go with this xo4—-, you’re going to see it’s going to give me this kind of toning effect, it’s pretty cool. If you’re interested in this little pack of presets, they’re for Lightroom or Camera Raw, I’ll make sure I try to remember to link – link my buddy’s site in the bio for this video, so you can check them out yourself, if you’re interested.
And now what I’ll do, I’ll come back to the basic editing tab and I’m going to boost clarity quite a bit. So I’m going to go, I don’t know +50-ish in the clarity department. And I think I’ll also come over to the effects, I’ll push clarity – er, dehaze, I’m sorry, not clarity, I’ll push dehaze up maybe +20ish. That’s a bit strong, but I think it’s kind of working for this image. We’re going for something that’s just over the top dramatic. And then we’re going to add some post crop vignetting as well, So I’m going to push this up to, maybe around 10, something like that, eh, maybe 20. We’ll pull it back a little bit if we have to. Let’s increase the midpoint – I’m sorry, decrease the midpoint, let’s take it down to about 30, that looks good.
I’m going to leave the roundness where it is, and I’m going to increase the feathering, something like that. Alright, so 20 is a little bit too much, let’s take it down to maybe 10? 10, 11, 12, 13? Something around 13, 13 looks good. So, 13 for the amount of vignetting. And I think also, we’ll jump into camera calibration. We’ll do just a little bit of toning here. So for the red, we’re going to shift the red hue about -10, and then saturation, we’ll boost to like +10. I don’t think I want to mess with the greens at all. And for the blue primary, I’m going to knock that down -25, and we’ll push the saturation up – I’m going to try to go crazy with this, I’ll go like +50. Actually, it’s not quite as crazy as I thought it would be, I think it’s kind of nice. I’ll go back to basic, I’ll hit OK. And you can see, obviously, it’s a really, really extreme effect. But the beauty of this extreme grade is, we now have this smart object on its own layer, and we can simply reduce the opacity a little bit, blend the images together, and get the exact look we want.
So I could put it right around 60%, let’s just say hypothetically, this is what I wanted. The last thing I would probably do here, is grab my brush tool, make it huge, so just use your left and right bracket keys. Now you can see it’s not going to let me do anything with the brush, because we’re on a smart object. So let’s enter into quick mask mode, right here, hitting the enter quick mask mode icon. And I’ll make my brush huge. So I want it to be giant, and I want it to be very soft edged, and I want the opacity to be 100%, and I’m just going to go ahead and paint into the foreground something kind of like this.
We’re going to try to darken up the foreground just a little bit, hit the letter Q to load that as a selection, and then we’ll go Select>Modify>Feather, and I’m going to feather it a lot, maybe by like 500. And then I’ll add a levels adjustment layer here, and all I need to do is set the levels adjustment layer to multiply. That’s going to darken the foreground, now it’s darkening it way too much, but we have our opacity slider.
So we can slide the opacity back. Just darken up the foreground a little bit. Now we’re going to hit the letter Q to enter quick mask mode once more, and this time, I’m going to paint up in the sky. So kind of painting over all the dark areas of the sky, just like that. Hit the letter Q, and then we’re going to go once more, Select>Modify>Feather, we’re going to feather it by 500, again. And we’re going to add another levels adjustment layer, this one, however, is going to be set to the screen blend mode, and once more, we’ll just reduce the opacity. Something down around 25, and we can see if we shut those two layers off, and turn them back on, we sort of digitally relight our image. And it gives a nice – just an inversion of sort of where the eyes should look. Really, it’s going to go ahead and plant our focal point somewhere right out here. So when we look at this photo, we’re looking right in through here, and then we notice the big, beautiful clouds, and then we start to notice some of the detail in the foreground, and in the midground there.
And then lastly, we start to pick up some of these edge details. And those of course, are the areas that we kind of did the poorest job making sure our selection was ready. So, especially with this particular image, this is the way to do it. (dramatic noise) And yeah, there you have it. That’s kind of a relatively straightforward sky replacement. But it’s such great technique – well, not really a great technique, I should say, I sound like I’m tooting my own horn. But it’s a great thing to know how to do, I’ll put it to you that way.
So if you need to knock a sky out from behind somebody or something – boom, you can go in and do it just like that. If you enjoyed this video, make sure you subscribe to my YouTube channel. If you really enjoyed the video, you can follow me over on Instagram, @tutvid. I try to do a live show, and other cool stuff over there all the time. What else? Oh! Discord! If you’re into Discord, you can join our Discord server, discord.me/tutvid, the URL will appear on the screen at some point during this. And guys, for the blend mode, and brushing, and channels, and creating selections, and sky replacement goodness that we covered in this video. That’s it! Get it? Got it? Good! Nathaniel Dodson, tutvid.com, I’ll catch you in the next one. (upbeat music) And before you go, make sure you subscribe to my channel for more great tutorials everyday! Also, buy my course! It helps us do what we do, and this channel is supported by viewers just like you! You can also just click the thumbnail and watch another video from this channel.
See you next time, guys. (upbeat music) .
As found on Youtube
Posted in Photoshop


