Graphic Design – Adobe Illustrator/Photoshop – Slice ( Part 1)
bhadra 0 Comments Illustrator
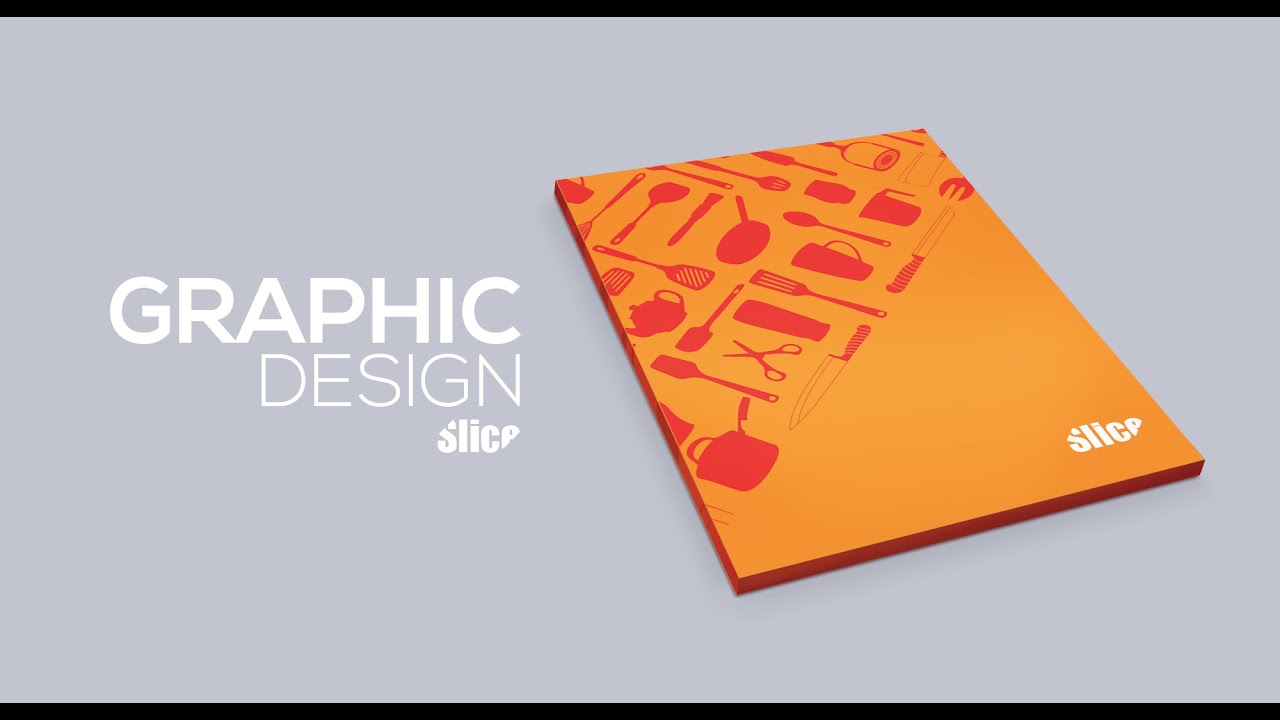
Today we will be working on Slice GraphicDesign. During this design process, we will understand the easiest way to create vectors,using 3D perspective to create dynamic design and achieving a customisable project files.So to design this , we will follow few interesting steps. First we will create out the vectorbundle. I have got some images from google. So we will use this images to convert it intovector and also trace out the images using pen tool. So select the image and embed it. Thentrace the image to black & white, then expand it. This will convert the jpeg image to vector.Now ungroup it and delete the background. Now each element is separate, you can do therefinement by using simplify option. To do that, select the vector, go to object > path> simplify. In this panel keep the precision value around 97% and do the adjustment withangle threshold. Control the number of vertex to get smooth edges, then click OK.Also you can do manual refinement using the direct selection tool.Look up to all thevectors & do the adjustment. In the same way, convert the other images to vector & do therefinement. Use pen tool to delete extra points & direct selection tool to set the flow usingthe handles. Here refinement is the crucial part sincethese vectors are going to be used in our main design.Other way to create a vector is by tracing out the images using pen tool. In this casewe will trace out 3 knives. Fill up the handles with flat colour and the front part outlined.Now using the line tool draw out a line of stroke white colour. Then duplicate one moreon the other end.Now select both the lines, using the blend tool, click on one line thenthe other. This will create out steps. We will give 7 steps in blend option panel & clickok. After this using the anchor point tool, make the lines curve by clicking and draggingthe points. Do this for the other side as well. Do the adjustment until you get thenice pattern. Then duplicate this pattern and place it overthe other handles. With Alt pressed just click and drag to create a duplicate. Next selectthe pattern and expand it . Go to Object > Path > Outline Strokes. This will convert the linesinto fill object. Now subtract the pattern from the knife handle.To do that select both pattern & knife handle, then using the Minus Front option from thepathfinder, subtract it.In this way do the same of other two knifes.After this we will do the arrangement of all the vectors & place them in an order. Thenselect every thing and give a flat colour. We will add little detail to the knifes. usingthe pen tool draw out a curves showing the sharpness. We will give stroke thickness around0.75 pt. Finally our vector bundle is ready. You candownload this Vector Bundle from the link in the description.Our next step is to create the cover of our design. To create that , open a new documentand add a background shape using rectangle tool. Give it a orange colour and fade itlittle in colour picker panel. Then drag in all the vectors and place it aside.Now lets do a perfect placement of each element.We will bring the first knife and place it,then for second knife , flip it vertically using Reflect tool. Then place the other vectorsmaintaining a nice pattern. Each vectors has to be positioned to get a balanced design.We have to do some adjustment , the size and rotation to achieve a clean pattern.Do this for all the vectors. Make sure that you are not putting lots of unwanted vectors.Place it where it is necessary. Keep it clean & simple. Once you complete placing all thevectors, group it up. Now with the Shift pressed , rotate the group to 45 degree angle. Scaleit up, and place it diagonal to the overall rectangle. We will add extra vectors to fillup the empty area.You can duplicate the previous vectors and use it.With alt pressed , just click and drag the vectors to create the duplicate. After thatdo the size adjustment & place it. Then mask out the extra area by creating arectangle of same size of BG. Then selecting both vector group and the rectangle , makeclipping mask. Next add the text, type out SLICE, then choosea proper font. After that draw a rectangle, Rotate it to45 degree angle & place it over the text. Increase the length from one side.Now selectboth Rectangle and the Text and make clipping mask. This will give a slice effect. Thenchange the font to Impact. And finally our cover is ready. We will continue the furthersteps in the second part of the video. Until now we have understood how to create vectorbundle from image and use it to create a cover design.In the second part we will understandhow to uses 3D perspective option to create dynamic design & create a project file thatis totally customisable..


