LIGHTNING LOGO DESIGN ILLUSTRATOR TUTORIAL
bhadra 0 Comments Illustrator
today I'm going to show you guys how to
make this lightning bolt logo design in Adobe Illustrator using various
different techniques so follow along with today's lightning logo design
tutorial by Satori graphics what does that people welcome back to tutor
graphics the home of graphic design content right here on YouTube
so let's waste no more time and let's jump right in today's tutorial where we
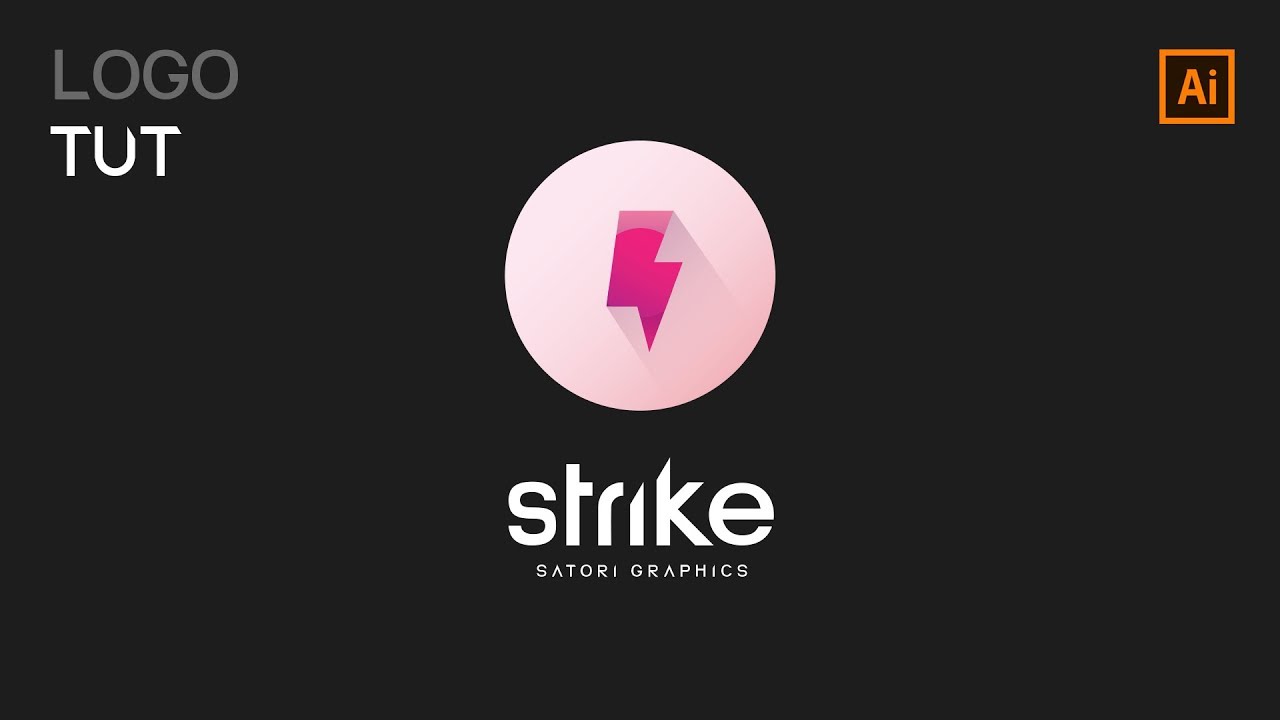
make a lightning logo design in Adobe Illustrator to kick things off in
today's lightning logo tutorial press L on your keyboard access the ellipse tool
hold down shift to make a perfect circle and then go ahead and add a gradient
fill with no stroke I'm in a kind of upbeat vibrant mood today
so I'm going to use strong pinks and purples but you can use whatever you
wish for your logo design and this is actually going to make up the lightning
bolt of our logo use the autopsying key to duplicate a circle two more times hold down shift is still at the top and
the bottom circle and send them to the back you can now go ahead and edit the
gradients on your circles I like to change the direction of the gradient on
the circles below the middle one so there's a sense of shadow coming from
the up above circle if that makes sense oh yeah there is no real science to this
it's your local design so experiment with what you think looks best when
ready press P to locate the pen tool and enter a lightning bolt you can hold down
shift and draw a straight horizontal and vertical lines you can press a on the keyboard to look
at direct selection tool and you can edit the path or the line and by itself press shift and eggs together to switch
between the stroke and the fill but we only want to use a fill for this part with the lightning bolt selected go to
objects compound path and make you can now place a lightning body with the
circles and then right or ctrl click and create a clipping mask you can also
access the clipping mask at the top under object so there is a funky vibrant
lightning bolt for today's logo design tutorial now we're going to make another
circle for the base of the logo design for the grade in this part the logo is a
kind of peachy color that extends out to an off-white bring your lightning bolt over the top
of the circles and then send the circles to the back you didn't to press command or control C
to copy the circle and then press command or control F to duplicate it in
place so now you should have two circles with the pen tool drawing a section
that's going to represent a shadow on a logo design with the shape complete hold
down shift to select it as well as both of the two circles and then send them
all to the back you can now edit the shape until it seems right for your logo
design now select a shape and one of the circles only and in the Pathfinder
window use the intersect option now have a cut out section that's going to
represent shadow on your logo design you're going to want to make a gradient
so there's a darker shade coming out of the Lightning by itself and at the other
end of the gradient you should use a 0% opacity so at this stage of the design tutorial
you're pretty much complete all you have to do now is add some logo type and the
following using today is a font that made by myself called Satori Sans and you
can download it via the link in the top right of the screen so there is today's
tutorial on how to design a lightening logo into a pretty straighter let me
know what you guys thought today's tutorial in the comment section below if
you did enjoy it remember to give a thumbs up in this video and also maybe
share on social media so other people can watch it too if you haven't done
already remember to subscribe to satura graphics for weekly graphic design
content just like today's video I upload three to four times a week on graphic
design content just like today's tutorial but also other aspects of
graphic design so if you do like what I'm doing here give me a subscribe and
ten on the notifications so you never miss an upload until next time design
your future today you