Photoshop CS6 | Bài 01 Học cách sử dụng các công cụ, ghép ảnh và hiệu ứng cơ bản.
bhadra 0 Comments Uncategorized
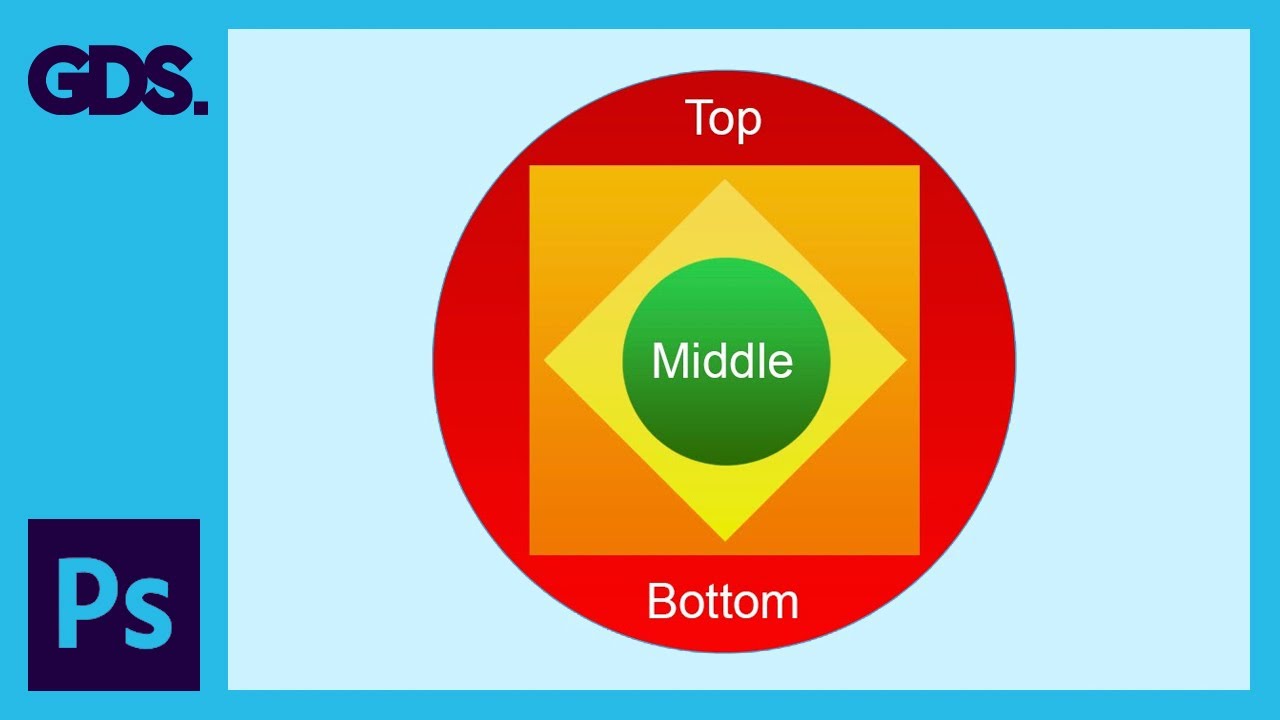
If you find it interesting, SUBSCRIBE to the author's support channel Hello all of you ! Welcome to the Programming Library in the Photoshop CS6 learning topic for beginners First I will explain to you how PHOTOSHOP works and how PTS looks at an image Here I have 3 pictures as an example, stacked in one direction. Blue at the bottom, green in the middle and gray at the top. It should be noted that the green and gray images have holes For example, now that our eyes are looking this way, what do we see? The image is like this !!! WHY? Because the images below will be obscured by the images above (except where the top is punctured) In PHOTOSHOP, the way it handles images also has the same principle.
Photoshop will have a structure that can have multiple layers of overlapping images called Layers Just as you see this result, there are 4 ABCD points marked as above because of the gap in the upper side that can see through the bottom. Now I will start introducing the basic tools commonly used in PHOTOSHOPCS6 This is the interface of Adobe Photoshop CS6 You should note that this interface is allowed to customize, change the layout of the parts, so if looking different from your interface is also normal. All feature panels can go to the Windows menu to turn it on and off by clicking on its name Now I will introduce a few feature PANE that you will use often The first is the PANE TOOL BAR The PANE contains mouse manipulation tools, and you'll use this almost every time Pane Layers to manage the overlapping image layers we have in the file we're making And note that each of our operations will be applied to the currently selected layer.
Always have 1 layer selected. Next you need to care is the OPTION for each TOOL selected in the TOOL BAR This OPTION means more options for the mouse tool we are choosing to manipulate Another important PANE is HISTOR, to manage operations and remember the operation history. If the error is wrong, you can choose to go back to the previous operation steps. Now comes the meaning and effect of each mouse tool on PANE TOOLS You use the shortcut CTRL + O to open an image file Before introducing the tools, I want to introduce a new and extremely important concept The first concept is the term SELECTION The selection is part of the image of the currently selected layer that we have chosen to process, which means our operation will only affect that area. The next concept is the term EFFECT or also called filter.
Depending on the effect, there will be different effects, mainly effects on light, color, color mixing, … When you get to that part you will be introduced in detail. The next concept is the term MODE (MODE). Different modes will have different ways of mixing colors and the number of color channels, depending on the purpose of our processing, using the appropriate mode. The default is RGB color mode We can change MODE by going to Image> Mode> selecting the mode name The next part is the repeating, you should note, there is always a layer that is currently selected, because our operations need to be applied goals. Sometimes you get confused when applying the wrong Layer operation because you do not check which layer you are choosing !!! You CLICK HOLD on it will show more shapes to choose as in VIDEO This is a group of tools used to create selections with special shapes: square, rectangle, circle, …

The mouse pointer image means that there is no tool selected, we need to select this so we can drag and drop layers on the image. Go to Layer menu and select New then Layer via copy to cut the selected area into a New Layer. Or you can use the shortcut CTRL + J to replace the Layer menu menu 🙂 Looking at the Pane Layer you will see that the selection has been duplicated into a layer called Layer 1 Here, you can turn ON / OFF the LAYER display by clicking on the eye icon next to the Layer To delete a layer, simply select LAYER to delete then press DELETE or right-click on the layer in the Pane Layer and select Delete Layer.
For this tool, if you want to select the true ROUND area, you need to press SHIFT key when creating To move a selection, drag the mouse over the selection and then drag it to a new position SPACEBAR key, guys, I read it wrong. That's the Space key Press CTRL + Z will restore an operation step. Or go to Windows> History to see the list of past operations Zoom in and out quickly press ALT and roll the middle mouse.
Over Spacebar (space) I read wrong .
Posted in Uncategorized


