РЕТУШЬ КОЖИ ЗА 1 МИНУТУ В PHOTOSHOP CC!
bhadra 0 Comments Photoshop
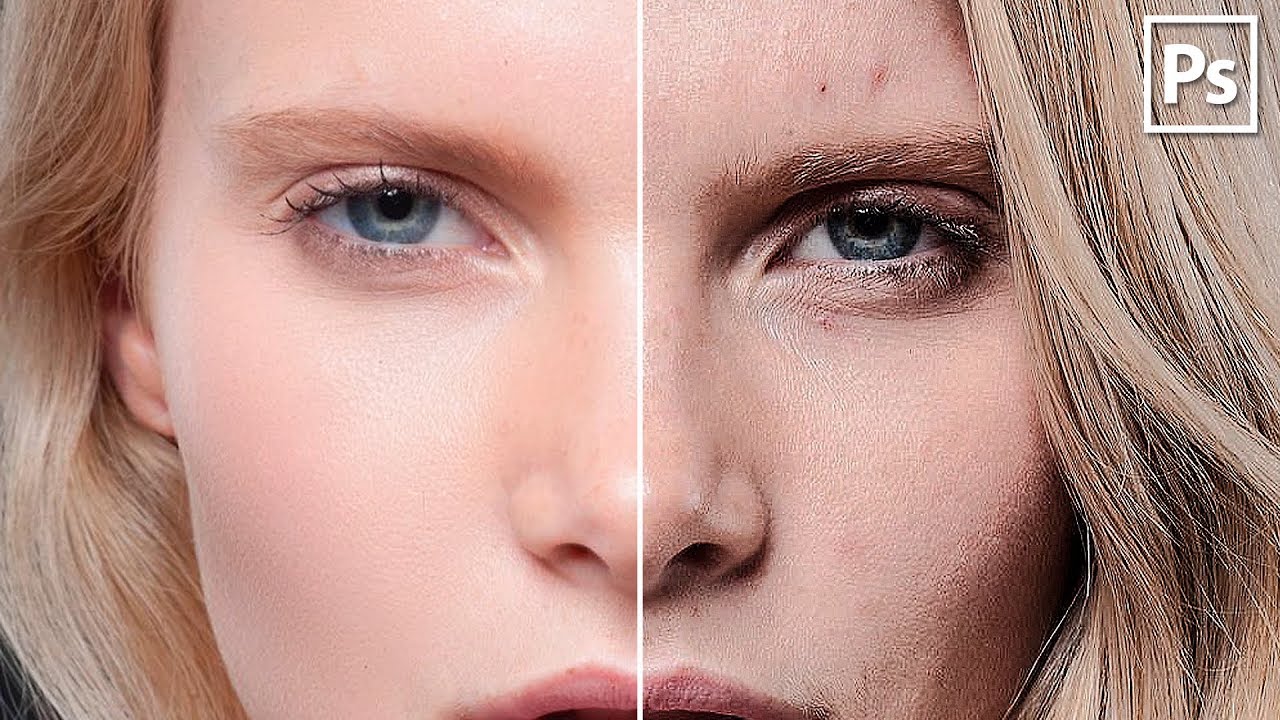
Hello everyone to you, Vitaliy Menchukovsky and photoshop again this time we're learning super quick retouch portraits a to be precise skin on contracts there are a bunch of different techniques a bunch of different methods and they all require a certain skill and time but there is super cool a method that allows us in less than minute but maybe a minute with a little make fast quality retouching your portrait skin when this can be used in principle in any incomprehensible situation with a portrait can use this technique but she great when you don’t have special time portrait does not require very large processing i.e.

There are slight defects and you need to do it very quickly let's get to directly process and so there are 2 photos actually they have nothing sauce there’s no such supernatural I don’t chose whale super there over there not real photos himself with stitches to everyone the rest is not, we will take here two more or less standard photos links to these pictures will be in the description and now we will quickly do skin retouching and so let's go and all that need to do this duplicate layer as usual with a duplicate layer and now magicians invert layer begins by pressing the keys oh it turns out well such a negative chick we leave one order we say well that's cool kidding then change the blending mode to bright the light got worse yes now the place pictures we see something strange this intermediate effect which owes us to be if you have everything like this means you do everything right next we go to the filter tab is different and we are here edge contrast idle transfer fund smear edge color contrast I think you will find click on it such a thing appears here adjust the radius of the essence of what you see how the skin actually changes to us need to achieve Well, that's about the effects adjust the video now look so that those defects which dial they smoothed out in this case I will have enough doom here but 9 10 pixels more than click ok increase well yes here the photo got worse but again sent stage next last step before we start in the morning count highlight our sites filter-blur-blur tab by his gauss is now magic in action just twist the blur radius and look how does our skin change here the blur radius ranges from 2 to 5 it all depends on the photo so in In each case, everything can be different just move the slider and see what more radius means less effect the smaller the radius, the greater the effect we select the radius we need it’s on the skin, well, let’s say this here is the effect all me basically more or less arrange like this and click ok well, as we see, besides the skin affected and other areas therefore hold alt and click on the create icon layer mask we got a black mask next we take the brush tool located here called hotkeys in white usually round brush select the right one us size and walk through the skin like this fast times how do you see the skin instantly sleep instantly and that's all all nuances disappear current dependence you want to get the effect adjust yours directly radius well here I wanted this effect see how fast it is it takes about a minute to depending on image size most of the time you spend on directly masking skin practically everything else is done automatically click click click click click and everything is ready so i will try but not strongly ladies take your time from of course we touch the neck so that the skin is everywhere it was the same not only on the face if you afraid of the abyss any section you clamp alt and click on the thumbnail of the mask immediately loading here so scary and we see that in some places I certainly missed and you can respectively these sections paint again the altam and returned to this option will suit me in order to allow a little lower the effect yes if you think that the skin is too plastic just slightly lowering the opacity thereby introducing this effect and get a plus minus the natural skin tone all image dependent so let's let's see what happened what became more precise what it was now what became in just a few minutes about 200 times all all defects excellent cool technique disappear and suitable for those who do not really want strain so let's fix the photo to us board and here we have quality larger images are better taken with stock resources, well, as we see besides being on the skin and some small dots there and freckles let's see how this technique will work with such a portrait what’s the matter let's duplicate invert set bright light to blend mode next filter-other-color edge we select the contrast we need the radius in this case, you need more already somewhere here in this range ok again filter-blur-blur by gauss so here i think excel and so three and a half ok hold alt click whether to defeat the urai mask brush and go for ardi us skin we highlighted now we need lower the opacity since still we have freckles at least somehow on come out yes it's still part of the image man let's say so now I think somewhere around 70 percent I would stop in this case so let's see what we did and so here it is there was an option at the start in a minute we already have a completely different no defects nuances no most most importantly this technique allows you to quickly quickly do everything but this technique is not there will be panacea since some portraits require detailed study of individual Well, complex areas are Chinese women a scar is anything this technique just smooth it all out absolutely everything and works fast and when you need fast this technique is just a must-have in all other cases you need to try if it suits you cool doesn't suit use others if this video is for you liked it, do not forget to like it but also write in the comments how you have such a super fast way skin retouching if you walked my subscriber subscribe to my channel there very a lot of videos and not just photoshop's description under video links to mine social networks will join once talk to you well and also there I leave links to useful lessons on to my personal opinion all of this video we finished meet next everyone bye
Posted in Photoshop


