ALCE 3 for Adobe Photoshop
bhadra 0 Comments Photoshop
Hi and welcome to this video about the Advanced
Local Contrast Enhancer Panel version 3 for Photoshop. Also known as ALCE, which is the Italian word
for elk. Have you ever heard an elk call? Next time you're out in the bush, you'll know. ALCE is about Local Contrast, which in turn
is about Contrast, and aren't we all familiar with this concept? Of course, we are. Contrast involves a
Difference. Example: I'm in Contrast with my neighbor
because his dogs poo where they shouldn't. Different attitudes towards private property,
and manners you should know by the age of nine You can have Contrasting views about food,
politics, education, sex, whatever, but in the realm of 2D images, where pixels are the
only characters that play the game, if you want to spot a "difference" you've got to
look at pixels values.
Of course, I mean the brightness in each one
of their channels. So if you look at this tiny image made of
two pixels only, there's a lot of Contrast, because the two guys here are certainly different. Conversely, this other picture, mmm not so,
right? Low Contrast. Back to more meaningful images, you can build
Contrast following the same idea: forcing pixels to be different. How do you do? Stretching their values apart, i.e. letting
the picture fill the entire, available, tonal range slots. Mh?? Example: this image doesn't have any true
white and black point. If you push the lightest areas towards white,
pull the darkest areas towards black, and let everything else in the middle fall into
its own place in the universe, you're going to get: more Contrast. You're making pixels "more different". And we call this Global Contrast, because: A) We live in a globalized world, or
B) the Adjustment acts upon the entire image. Come on. Now, let's say that we want to focus on just
a portion of the image, a circle of this particular radius. Same as before, we can inject Contrast pushing
the lightest areas towards white, and pulling the darkest areas towards black – perhaps
not completely, with a grain of salt.
We know the trick now – much better than
the original. But what happens if we now uncover the whole
picture? Surprise surprise, it is a huge mess – and
with good reasons: you're feeding the entire image with food that's palatable only for
a very peculiar region of it. Bad times. And, of course, if you let the circle visit
different "locations", you'll find out that each one of them benefits from a different
adjustment. Moreover, depending on whether the encompassed
region is big or small, even the same location may require a different adjustment, based
on the features included in the circle. In other words, Localized Contrast is a
matter of finding a way to make targeted adjustments to image regions of specified extent all over the place Easier said than done – especially if you
think about literally rolling a circular selection throughout the entire picture. Which is not at all how ALCE works, but
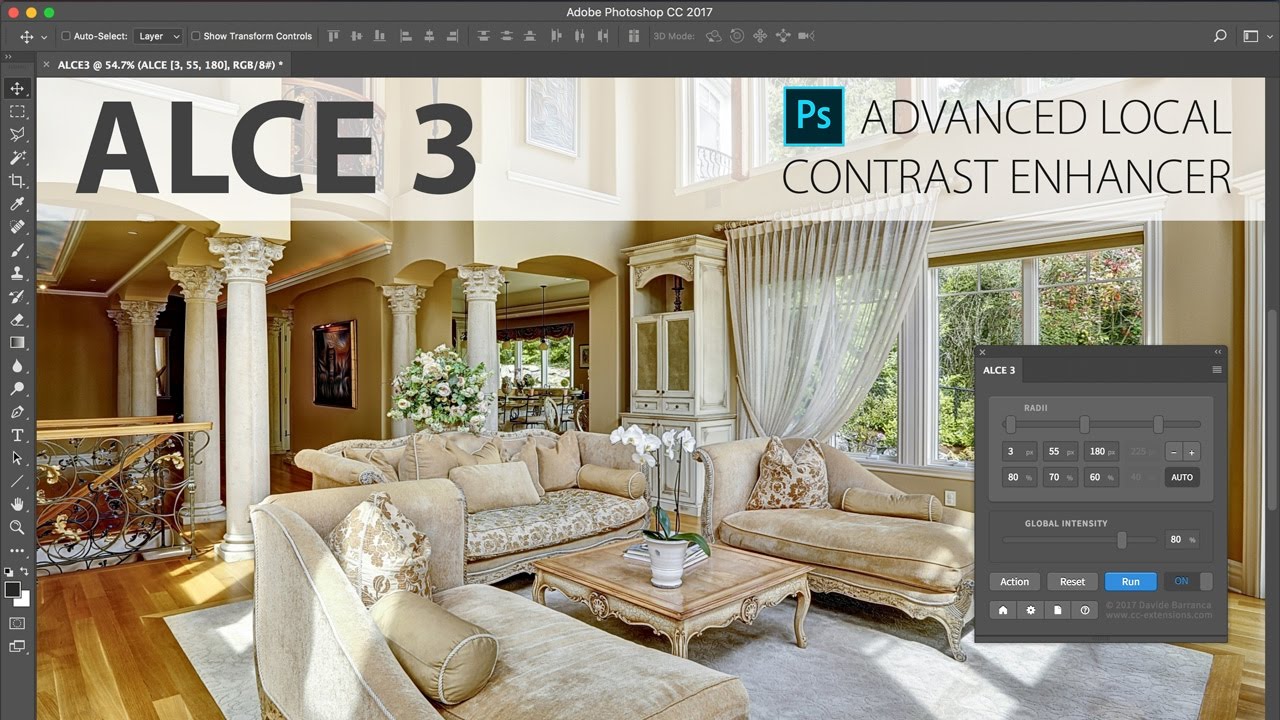
you get the idea. Time to see the Panel in Action. You have one main parameter which is, guess
what, a Radius, that is to say the Local…ness of the Contrast boost If the radius is small, the area of interest
is small too, and we talk about a "More Local", "Less Global" contrast.
Conversely, if the radius is high, the adjustment
is "Less Local", and "More Global". At the extremes, a 1-pixel radius ALCE is
very much like, and in some circumstances even better than, traditional sharpening.
And at a full-scale radius, ALCE tends to Global Contrast. This is the Intensity of the effect, that
you can adjust to taste. My advice is to play with the Radius while
keeping the Intensity at the maximum level: it helps to assess the Radius that fits your
image and your intents. Then, if needed, you can always dampen the
Intensity if it looks like too much. Now comes FAQ number one – what could "a
fitting Radius" possibly mean? Take this image as an example: do we want
a large Radius, a small Radius, or something in between? Generally speaking, the Radius must suit the
kind of detail you want to boost.
This portrait has appealing features that
span some large areas, so if you remember the circle-of-radius-whatever thing I told
you about a minute ago… It all boils down to finding a Radius that
"resonates" with the image features you want to enhance. Like so. If you use a smaller radius, mmmh, it brings
to attention tiny features in the skin that are either distracting or plain ugly when
boosted – but hey, you'll be the judge. Intensity: to taste, I'm loud here for demonstration
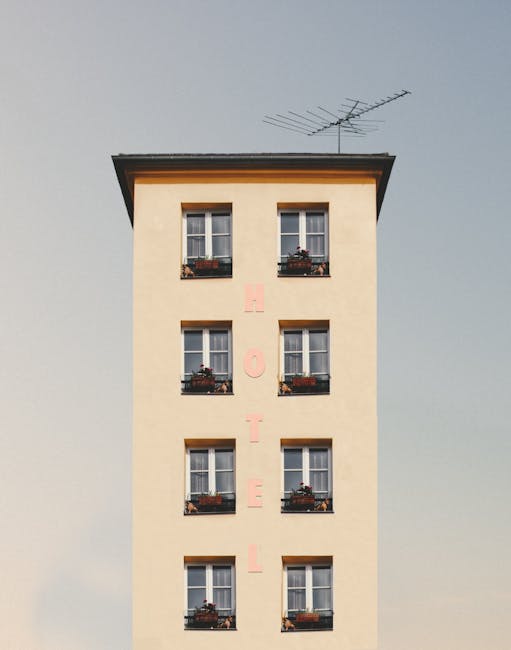
purposes only. In this picture, conversely, the main features
are smaller, and so should theoretically be the radius that is going to boost them. Please note that when I mention "big" or "small",
I refer to the radius compared to the actual image size: if your starting point is a billboard-sized
300ppi image thousands of pixels wide, a radius of 10 pixels is a tiny nothing. Downsample to a gallery thumbnail and all
of a sudden 10 pixels become quite a lot.
Big or small, relativity is the key word! ALCE is as easy as it gets in the beginner's
hands, but it is a nuclear bomb if you know your channels blending, masks, colorspaces
and the entire, usual color correction arsenal. I'm not going to cover advanced techniques
here because there already is a 90 minutes, specific, multipart, HD video series that
goes through them in excruciating detail: check that out here, it is a true retouching
masterclass, and it's brought to you ALCE lovers for free.
Yet there's more that I'd like to tell you
about ALCE right now. As a routine, it is incredibly awesome if
you apply it in multiple rounds: increasing the radius, decreasing the intensity. Uh? Yeah I know. This comes from a technique called octave
sharpening – a mouthful, but pretty neat nonetheless. ALCE 3 features, and automates something equivalent
in the Local Contrast domain, so without further ado, let's press this plus button and oh! A new handler appears. You can drag it and you see that a second
radius is set. Mind you, when dealing with multiple radii,
auto-preview is disabled, so you have to click the run button to check the result. So what's the panel doing? It applies the first radius, which is the
smallest one, at this intensity, then on top of it, it runs a second extra ALCE round with
this other radius, bigger, at this intensity here. And you see that the result is different and
remarkably interesting. You can add up to four sliders, and if you want to have them
evenly spaced, press the AUTO button – middle handlers will be automatically positioned.
Move one yourself to break the symmetry or just uncheck the AUTO for full manual control.
You see that the intensities of each round
are predefined, but they can be changed according to your taste, and tests. Be aware that multiple rounds of ALCE can
reach ludicrous levels of contrast pretty soon if you keep the Intensities high, so
my advice is to start low, and then just play and have fun. Also note that now the Intensity slider's
got a new name, it's Global Intensity; it's basically mixing the multiple rounds result
with the original, unprocessed image. Octave ALCE, or what you wanna call it, is
a relatively new field: I've done lot of experiments myself in the past, but it's always
been like an advanced technique known and mastered by very few people.
The new Interface of ALCE 3 integrates the
multiple rounds routine and makes really easy to test and tweak it, so I'm confident that
Octave ALCE is now ready for the limelight. You may have noticed, though, that the smallest
radius comes first, so all the rounds are applied in an ascending order. This leads to the best results in my opinion,
but what if you wanna change it? This brings me to the topic of Preferences,
this button here, where you can define the Panel's settings – on top, the default intensities
for each round, then the radii order: ascending, from smallest to biggest, or descending, the
reverse.
At the bottom, live preview – that, again,
works only for single radius ALCE. Besides Preferences, in the footer you can
find the product HomePage. If you're stuck, here's the manual, it opens
a PDF that contains basically what I've told you here, plus it has some real world examples
too. If you need support, or just want to say hello,
here you can find me.
ALCE 3 works internally with a C++ plug-in
which computes the image data with 32bits precision, and it also works with 8, 16, and
32bits HDR images, on Photoshop from version CC onwards, both Mac and PC. If you want to record ALCE into an Action
for Batch purposes, why not, this button does exactly so. I hope you'll enjoy ALCE 3. I've worked on a lot more Photoshop extensions
that you can find here on my website. Thank you for watching, bye bye..


