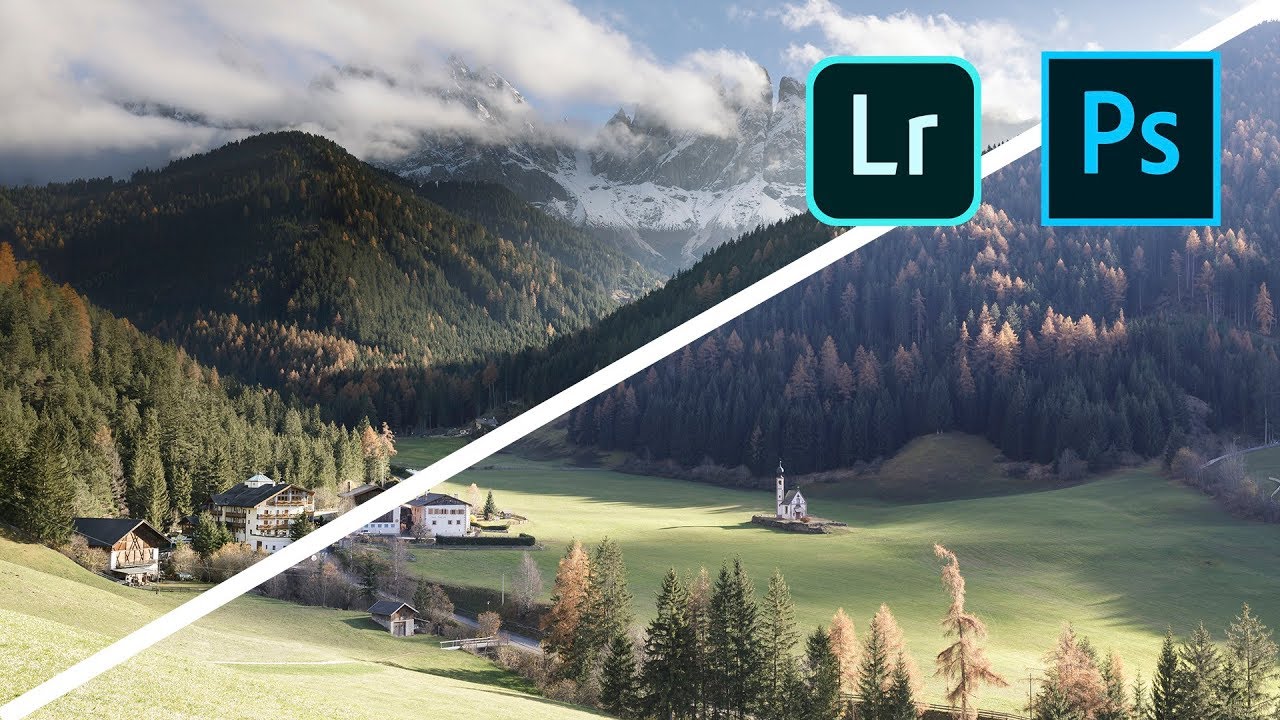
How to edit LANDSCAPE photos with Adobe Lightroom & Adobe Photoshop
bhadra 0 Comments Light Room Photoshop
Post-processing our landscape
photography images or in my case both landscape photography and travel
photography images is something that we all have to do whether we like it or not.
iI's fair to say that the majority of us we use either Adobe Lightroom or Adobe
Photoshop or a combination of the both of them to achieve the results that we
need in our post-processing. So what I'm going to do today is I'm going to start
in Adobe Lightroom with an image that I created in the Dolomites, not the one
you see behind me, and then finish off in Adobe Photoshop. Now if you're thinking
who am I and what am I doing here my name is Julian Elliott. I am a professional
landscape and travel photographer. If you're interested in keeping up with
what it is that I do make sure you click on subscribe down there and click on the
bell up there to get notifications of any new material that I'll be doing, and
there will be a lot this year.
So let's jump from me to the computer starting in
a Adobe Lightroom with an image from the Dolomites that I captured early last
November. Lightroom Adjustments OK, so as I mentioned, or I hope I
mentioned, this is an image from Dolomites which I captured back in
November 2018. It was around the 12th of November if memory serves and according
to the date that's what it was. So as you can see up on the time it was
about half past two or so in the afternoon. That may or may not have been
the actual time I can't remember if I'd reset my camera to the correct time or
not so don't pay too much attention to the exif data there. It was captured
on my Canon 5d Mark 4 and 24 to 70 Mark 2 f/2.8 lens and what I did is I used the
auto exposure bracketing. I used just two exposures because that's normally when
I'm blending only really need two exposures and I just set it up I
captured this one here so this was captured at ISO 100 f11 of 1/8 of a
second and then the darks that I've got there was captured at f11 and one
sixtieth of a second so that allowed me to capture all the detail that I needed
in two different exposures.
If I jump back into the light exposure here the
foreground exposure you'll see straight away the sky is obviously overblown. Now
I know a lot of you who've been following me for a while you know that I
use graduated filters and you might be saying to yourselves why didn't I use a
grad on this you'd save yourself loads of time and not be messing about in
Lightroom and Photoshop as we're going to do today well sometimes I feel it
doesn't always work with grads you have to know when and when not to use those
grads and this is one of those occasions where I had in the back of my mind I
wanted to do a tutorial like this in any case but for me personally I felt that a
grad it would cut across I'd have to angle it down here so the grad would cut
across this part here which I didn't really want to do and so that's
basically why I decided to use two exposures and do what I'm doing now.
Now
the first thing that I do and I always think is there any dust that's on the
sensor so in Lightroom if you press Q that
brings up the dust spots tool here and then if I press A what that does is it
turns this mask on and I've put the slider right over to the right-hand
side and you should be able to see very quickly if there is any dust on your
lens or not first. At first glance there certainly doesn't seem to be anything so
I can pretty much assume that on the second exposure that's highly unlikely to have any dust so if I click here again that'll get rid of that.
The next thing that I'm going to do is if I work down from the top from the basic
right down to the bottom or actually sorry I won't do start at the bottom
look at camera calibration now I'm not using the most up-to-date version of
Lightroom I think this is version 7.2 or something like that I go to profile and
I always click on camera neutral and what that does is you'll see there's a
slight drop in the exposure there is it removes any nifty little things that Adobe might have put into their Adobe profile the Adobe color profile and I
just want it as neutral as I can get it to work from that the next thing that I
do is go up to my basic tab and I think okay is the image overexposed
underexposed look in the histogram of course you can see here as I've got the
indicators on it is overexposed in the sky that's why we're going to be
blending and doing other things here what I do like to do is just add in a
bit of white so I push the histogram over just a little bit and just add in a
bit more lights into the foreground push up the shadows just a little bit not too
much adding a bit of vibrance to bring any
color back into some any colors that are very weak that's what the vibrance does
I'm not going to touch saturation so certainly if we look here in these trees
down here they do look a bit washed out so we're just adding a bit more color
here we're going to do something else in Photoshop anyway which you'll see adding
a bit of clarity and that will add in a bit more mid-range tones in here we're going
to again be using a few more things in Adobe Photoshop and then I have to think
is does it look okay to me now if I look down here at this foreground you'll see
there are some parts that are pretty much that overexposed down there
so if you look at the RGB this is ninety eight point three ninety seven
point eight ninety six point two why is that overexposed it's just white stone
path that goes up there from the bridge now if you are in this valley in the
Val di Funes and you're thinking how do I get to this view point something
I'm going to tell you right now is if you park down here and you walk to this
bridge it will say private property this is private property why was I stood
there very simple I had permission I asked in my, the little Italian that I do
know and was told yes it's fine I can stand in the field so just be aware of
that don't go and stand where I was thinking that it's fine it's not fine
it's private property but I did have permission anyway so
let's calm this grass down a bit so I just got hold of the grad tool there so
let's pull that up let's turn on the mask overlay just to see where that's
going to effect it so what I try to do as well so if I just get hold of the
grad tool the further you come out here on the line the easier it is to maneuver
so if I just pull this around just a little bit just to line it up with the
line that's sort of going up there now I don't want it to affect the house so
there was a little bit of overexposure coming in there on the house what I do
is just pull this down just a little bit now from a previous time that I've used
the grad set the whites at 25 I'm going to take off the overlay because I know
where it's affecting I'm just going to pull down the exposure just a little bit here
let's pull down the whites and you'll see those whites disappear down here on
the wood store so that's pretty much calmed down from where I was if I
quickly look through a before and after you'll see what we've done so far so you
can see there's a bit more color coming back into it obviously the
sky still overexposed but you'll see that I'm not doing a lot at all at this
point in Adobe Lightroom.
The next thing that I'm going to do is if I've
got a single exposure at times what I do because I use the time curve to correct
any color casts so if you see here you will see that there is looks a little
bit blue from this top heavy light that's coming down so it's very high in
color temperature if I hover over here with my mouse over this dark part you'll
see that it's saying the R and the G around 18.5% and the blue as I can see
with my own eyes is very high that's what's causing them
there is a blue color cast in those shadows which is pretty normal because blue
there's a lot of blue in shadows but in any case I think it looks a bit bad so
I'm going to sort it out not here actually in Photoshop and I'll show you
how I do that in Photoshop so I would ignore the tone curve I'm not going to
do anything in hue saturation luminance the detail this is my own sharpening
that I used for my stock stuff so sharpening I found works pretty much across the
board for what it is that I do so 78 0.5 and 35 masking is you have to
do it image by image so hold down the Alt key on your keyboard
drag it across and then you'll start to see sometimes as well if you've
missed dust spots the masking here will actually show where they are again so if
you think actually what is that up there is there any it doesn't look if there's any so
there again something I found working my own images over the years you know I've
been doing this eight and a half years now this is pretty much my default noise
reduction works on my stuff what it is that I'm doing and lens correction
normally I'll start with this but anyway I'm working down panel by panel so
remove any chromatic aberration and any profile correction that needs doing so
obviously around 35mm you'll probably have a bit of barrel distortion there so
that's pretty much all I'm going to do on that image what I'm then going to do
is synchronize those settings across so when I click on synchronize there so
things I don't have ticked here a spot removal and crop I haven't done any spot
removal anyway and I haven't cropped the image so let's just synchronize those
two images across there moving on to the darks don't just synchronize and then
export your two images so on this one here what I want to do is actually start
looking at the sky and thinking how natural does the sky look I think it
looks a little bit unnatural so what I'm going to do to undo the clarity on this
undo the vibrance so it hasn't really the vibrance hasn't really affected the
sky anyway what I am going to do is just undo those through there so I'm leaving
everything else here because they so that the lens correction what you've
seen the lens profile correction what that's done removed any barrel
distortion synchronized to across your two blended images so that when you
bring them into Photoshop that is not going to cause any problems what I am
going to do is I am going to push the exposure up just so I can get the sky
looking just for me just a little bit more natural so you obviously here in
the whites here I don't want to push this too far in the white so that it
overexposes the white now what you will see is that if I can just..I might just
to push it just a little bit further 95% white I can't push it any further one
looks of it is pretty much where when you print it 95% then that's going to
anything above 90% 95% it's not going to print so they are a 94.1 93.8 93.9
there's pretty much no color cast in those clouds that's great for my
highlight for the highlights that I want to do what I am going to try and do see
if I can just bring up the shadows here in the Odle back there and they push
it up let's see how much more I can push into
this again see if I can push the white actually and without over exposing it
that's probably a bad as far as I can get it without affecting this too much
and obviously that as I said it was very top-heavy like the Sun was somewhere up
around here and it will be quite white when
the Sun is beaming down here but in any case that's probably as far as I'm going
to push both of those two images now I know a lot of people will export to TIFF
in this case just for simplicity and avoiding all profile errors etc between
Photoshop and Lightroom I'm just going to export two JPEGs
in this particular instance so let's go to file export and I've got a folder
that I set up different export profiles as you can see here so what I'm exposing
when I'm exporting for Getty I always put setup this specific folder so
everything's all in one place with different libraries that I might be in
so let's just put this in here so this is called this Dolomites tutorial I can
spell it and what I'm going to do is go down and make sure that it's going to
open up in Photoshop again I'm not using the most up-to-date
version of Photoshop is on 2018 I know they've just it's obviously on 2019 now
so when I export that's going to export these two images to Photoshop and then
we're going to start blending and doing whatever else we need to in Photoshop Photoshop – First Preparations so now that our images have opened up
in Adobe Photoshop what I need to do is blend the two images together now for
those of you that are eagle-eyed you'll notice on the left-hand corner that I've
got the TK actions panel what's TK actions TK stands for Tony
Kuiper and this gentleman in the United States he does a lot of things with
luminosity masks and all sorts of other things he's created this great series of
panels that he sells and I think it's about $60 or so I can't remember which
version I'm using it's a couple of versions old but it gives me everything
that I need to do with the images that I like working on in any case I have found
over the last couple of months I'm only using three panels it comes with six I
only use TK control TK rapid mask two plus TK actions so with that said and out the
way our lights and our darks images have opened up in Photoshop we need to blend
them together so how can we do that so there's two different ways to put the
exposures actually in the same file so if you press ctrl a to select all of the
image and then command or control C and then you can go to your lights image
then just press command or control V it will just place it right on top so
you'll see down there on the right hand side that they are there's one layer
there for the background layer which is the light one there and then what I'm
going to do just name that quickly two lights and then you'll see you down
there with layer 1 which is the darks so it's just pretty no no darks so that's
one way of getting in your two exposures together what you can do is there's
another way of doing it so if I just remove the darks there is if you if I
press can command or control D that will deselect the image there if you press V
on your keyboard it gives you the move tool hold down shift and then if we get
hold of this and then we can drag one to the other then eventually goes in over-the-top there you go
so basically that brings in the darks on top of the lights let's just rename that
darks and as you can see we've got a light and a dark so let's click off that
now a little tip here if you may or may not know this if you want to see if your
images are actually aligned is if you go down to the the darks image here and
click on the blending modes if you go down to difference what this does is it
gives you this nice funky looking image here and very very quickly if i zoom in
to 100% and then if I hold down the shift the spacebar sorry you can see
with the difference if the images are actually aligned or not so if I get hold
of the darks image and I start to move it around like this then you'll see
whether your images very quickly have an alignment problem or not which can
happen if you're out and it's blowing a gale out there and you're taking two
images so that's just a little tip there so I press command ctrl Z puts them back
together again so difference so get rid of difference blend mode to go back to
normal now as I said obviously we are going to blend these two images together
there are a million and one ways as always in Photoshop to blend images how
am I going to blend mine I'll show you Photoshop – Luminosity Masking so how do we blend two images together
in Photoshop so there are a million in one ways as always with Photoshop to
blend images I'm going to use a combination of luminosity masks and also
the graduated filter in Photoshop now you might be thinking why are you
talking about the graduated filter in Photoshop why didn't use it in the field
you dummy well because you've got more control in Photoshop when it comes to as
I said these nice sculpted glacial valleys so let's look at how it is I'm
going to approach it so the first thing I'm going to do is add on a layer mask
now there's various ways of doing that just I find is just easier clicking down
here adding on the layer mask if you don't know this if you press command I
it will actually turn the layer mask black and invert layer mask but I don't
need to do that right now I am as I said I mean I am going to use the graduated
filter tool if you press G on your keyboard what that will do is it will
select the tool or of course you can go out to the tools panel
just select it you'll see there's a number of things down here apart from
the graduated tool the gradient tool I only want the gradient tool what that
will do is if you just drag a line is it starts creating the gradient wherever
you want it to as in if you've got a square filter in your camera you can
change the angle if you hold down the shift on your keyboard what that does is
it will actually restrict how you apply the graduated filter so if I want a
straight line straight down there this actually works on a lot of other
things as well holding down shift just creates a very quick gradient I don't
want the grad to actually go so going the wrong way for me at the moment is
creating a is masking in the top I actually need to either press X on my
keyboard or just swap these around here so I want the darks to be showing
through here on this here on a darks exposure here while hiding underneath
now you'll see obviously there's this nice line down here and that's what I
want to follow so basically if I just create a grad just around there what
that will do is it will very nicely bring in the exposure underneath now the
problem again this is why I didn't use a grad in the field is that this is what
it would have done is that it's then darkens the hill here and it's darken
the hill over here so what I try to do is just sort of go down very subtly with
the gradient tool and just find where it is that I need to go to bring in my the
image underneath so probably somewhere around there or even there that's better
so what that's done is it's I've got this nice blend here it is a bit too dark
over here so what I am going to do is I said I'm going to use a combination
of the graduated filter the gradient tool plus luminosity masks to bring in
this hill over here and I'm going to use a luminosity mask just for the very
simple reason that I'm trying to paint this in with the paintbrush so if I
press B on my keyboard enlarge my paintbrush and then start to bring in
the if I get a black paintbrush change my opacity change my flow hold down
shift on the number on the number pad change it to 70 it's done there come on there we go so if I start brushing in
here obviously I've got a hard brush at the moment I want the soft brush you'll
see it's not that easy necessarily if you go over then you start getting
painting in these different things if I go to my history let's remove the brush
tool so anyway let's try and find a luminosity mask that's going to allow me
to paint over this here and bring back in some of the this of the exposure down
here because again this affected this exposure here let's have a look so if I
look at a make sure that you click on to your actual image and not the mask
itself that I've created here so I've got a lights and a darks
so I quite like the fact that if I hide this here I can pretty much get most of
that exposure so let's click on darks one now you can see is bought in its
hiding a lot of the sky which is what I want and we've got these trees now what
you can do to further refine this mask is if on this panel here this TK rapid
masked T if you click on curves what this does is and then if you click on
the hand is you can actually adjust the mask itself so that's very quickly
messing around you'll see it's changing the actual mask yourself I just go over
here reset that so I really want to bring back these trees over here I click
this hand tool down here I really wanted to actually bring through the mask I
just drag it up there then it's bringing through the trees and I want to see them
so let's just leave it somewhere around there click OK that's giving me the selection that's
what's that is the luminosity mask that I've created is actually a custom
luminosity mask from darks one let's click on selection that will select
everything there if I go back to my dark layer click on the mask itself if i
then press command H what that's going to do or control H if you're on windows it hides
this selection but the selection is still there underneath so when it comes
to brushing on on top of a mask don't set your opacity and your flow to
100% it doesn't work at all.
If you really want to be brushing these in this
selection on top of the mask you want to be brushing it in nice and lightly so if
I set my opacity to 30% so you can either go up
either change it manually there you can scrub use the scrubbing tool there or if
you just press 30 on your number pad if you've got one then it will change the
opacity there flow again if you've got it up to 100 it will just go right over
the top without any care at all is better to bring the flow down I bring it
down to about 30 again and then if I just increase my brush size and then
what that would allow me to do is when I start painting on around here
it will do it very nice very subtly so let's see what that starts to do there
so as you'll see I'm bringing back very subtly the exposure underneath now
obviously with the lights coming down here from the right hand side this is
lit and this is in shadows that is how I want to keep it I don't want to overdo
it and that's why I suggest bringing down the flow of your brush so you can
add it in very subtly again here because the mask is here I need to bring this
back in again so that this will then even up the exposure down here so that
it doesn't look as if the mask has actually gone on top of it so that's started to even up again between
this exposure here and here and again where the light's falling these would
have had some kind of shadow detail on them and there you go that's very
quickly brought the two exposures together is blended them very nicely
together.
What can I do with this next? Photoshop – Dust Spots okay the next thing that I normally do
in images if I'm being really pedantic with my the images that I'm working on
certainly for a client is you want to make sure there are absolutely no dust
spots at all on this image how can you do that
well the next stage that I would do anyway is basically if I press and hold
down command or ctrl alt then shift and then press E what this does is here it's
created another layer and what this has done is combines the two images below
into one layer so if I then add on a curves layer to see where any dust spots
are if I push this up here now you might be thinking what on earth is this going
to do you will see and this is pretty much the ultimate way of finding dust
spots so sorry if I this
messes with your heads but basically what this does is it then this is called
a solar curve and I believe it is used in the film industry and what you'll
find is this is will tell you very quickly if I bring this up to 100% I
look in the sky you'll see very quickly if there are actually any dust spots at
all on this image now if when I'm looking at this I'm scrutinizing it on
my screen there are definitely no dust spots at all so let's press command
control zero bring it back to fits on the screen so let's remove that solar
curve there and there you go so we are back to our image again our base image Photoshop – Colour Correction right now as I previously mentioned in
Lightroom you'll see here that it looks very blue in the shadows now there are
there is a way of color correcting the images overall which is basically
finding the darkest point in your photograph using a threshold layer and
then clicking on that I'm not sure that will work in this particular case I'll
try it just to show you what it's going to do and what I'm talking about
so I go down to your layers here your adjustment layers so let's find
threshold so you see it turns the image black and white now this is an old
school way of color correcting so if you bring this down here slide this down
find the darkest point in your image so let's choose here for either the darkest
point if I hold down the spacebar command it gives me my plus tool by
zooming in tool so you'll see there if I press I for the eyedropper you've got
this patch here this is one of the darkest places in the image which is
pretty much confirmed by turning off the threshold layer so if i shift-click
there it puts a point now if I go up to my info panel you'll see there that it
says it's 32 33 31 so certainly there that seems to be pretty much as it is
but we know there's a problem here what can we do well let's go back let's
remove that I'm just going to do it by I really my computer catches up if i zoom in here and I find a dark
point somewhere around here if i shift-click again you'll see this is
point number two that you'll see it says 50 56 84 definitely a blue color cast
let's get rid of it command zero that'll bring me back to
where I want to be go up here add on a curse
now as default it goes to RGB I want the blue Channel is the blue channel that is
giving me the most problems click on the hand click on the two and what that does
we're going to drag this down actually you going to have to you as it's gone off
the edge of my screen so I can show you this properly
let's bring the info panel out so you'll see once I start dragging down on the
curve on that point there that's been created you will see that this 84 this
is the input and this is the output I need to get that 84 lower and what
that's going to do is it's then going to add in yellow to the image so you can
see they're very subtly that blue is going now I'm not going to overdo it because as I said of course there is
blue in the shadows anyway so let's bring that down probably somewhere
around there is fine I don't if I bring it down to 56 it'll probably look too
warm now you might be thinking how do these work so basically if you've ever
paid any attention at all to how images work you have RGB red green blue that's
how color photographs are made up three different channels in printing you have
CMYK the opposite of R (Red) is cyan opposite of green is magenta opposite of
blue is yellow.
So when there's a blue color cast, how'd you get rid of it? add
in a bit of yellow. so that's how the info panel can be very handy so as you can
see there if I click before after you'll see the image goes from looking really
blue and cold to just a little bit more warmer. what's next? Photoshop – Adding in Contrast the next thing that I want to do is look
at this image and think okay does it need any contrast adding into it through
something such as curves now you could if you want to add another curve on top
of this and then do a classic s-curve which is just bring up the highlights
bring this down and then there you go there's a nice bit of contrast been
added in but it's not very targeted that's the problem
so although it is a quick fix it can look okay let's click it on and off it's
added in other problems the other problems is of course that I've
increased the highlights which is add if you look down here that's then actually
accentuated those highlights down there I don't want to do that.
Let's remove that.
what I am going to do is use a luminosity mask instead to actually pump
in a bit of contrast in these trees here because I feel they're lacking just a
little bit and also over here so let's see if I click on a dark one what that's
going to do yep so darks one that I'll give me certainly what I want here I
don't have a darks to is even better again it's more targeted you'll see the
sky is starting to be masked out we're losing the ground here which is
nice I don't want to be affecting that so it's really these trees here that
interest me and over here this is where all that light was filtering down from
so let's choose darks two click on layer and then curves and what I'm going to do
is I'm gonna click the hand tool there and just to add in the contrast around
here the hand tool will target specific areas so if you look on the curve you'll
see there's a circle appeared so if I just click and drag down that's just
going to ever so slightly add in a bit more contrast in the shadows
got down ever so slightly probably there so you'll see it's added in just a little
bit more contrast and it's put a nice bit of punch into the image for me that
looks pretty much I'm not going to say perfect nothing is ever perfect but it's
look looking a lot better than it did if you want to see how the image actually
started out if you hold down alt and then click on the bottom eye on your
Photoshop layers what that will do is it will turn everything on and off that
I've done so far so if I do that you'll see where we've come from to where we've
got to Photoshop – Further Refinements okay so what can we do with this image
now is there anything else we can do it of course there are many things a lot of
people would look at it and go well I know I could do this this and this and
it's like what that's fair enough everybody has their own way of working
in both Adobe Lightroom and Adobe Photoshop I have mine right now this
particular image this is how I'm going to do it and this is how I feel that
this is what I think it needs one of the problems I do have which I thought I had
sorted is the green grass this down here it's a bit too bright still I thought
that sorted it but anyway what can we do now one thing I am going to do is
actually do command alt + E again just to blend everything back in again to one
layer and I do this so that basically when I'm applying a particular mask of
luminosity mask it's only looking at this and not trying to look at for
example the curves layer or this curves layer here I want to be very careful
where I'm getting things from I want to create another luminosity mask to try
and target this area how can we better target this area rather than just using
the darks the lights or even the mid-tones area so if you click on pick
this will actually pick a particular color to work on so obviously down here
this is a bit too bright let's see if I click on there click ok what it does is
pretty much targeting the grass how I want it can I do anything else with a
mask sure I can let's click on curves up here see if we
can affect that mask just that little bit extra than it is right now so again
there's a problem up in the sky let's see if I can pull that down that's probably not so bad what I'm
trying to do is basically I only want the grass the grass that's actually there I
don't want everything else I'm seeing how refined I can get that mask just
here because trying to paint this mask in is never going to work
so if I click okay to that what I've got is a very very refined mask for just the
grass and what I'm going to do is actually use this as a basis for the
mask what I'm going to do in a minute I'm going to use just another curves
layer again but when I create my curves layer from this luminosity mask I can
quickly go into the mask itself and paint this out so let's just do that so
as I said let's create a curves layer from this so when I click on curves
there it creates my curves layer over here with the luminosity mask click on
the mask itself click alt hold down alt and then click on it so if I get my
brush which is always selected bring the opacity up to 100 bring the flow to
100 click on shift to do that let's mask out all of this I don't want this affected
to be affected at all it's only the grass down there that interest me so
let's remove that careful not to go over the mask down
there obviously it's working on tonality
that mask so it's in the luminosity the brightness values are the pixels so what
I don't want is to effect too much I said only one the grass so that's pretty
much just the grass so if I click on the curve symbol there on the layer what I
start adjusting the mask itself it's only going to be affecting this grass
here if I click on the hand tool let's see if I can just bring it down make it
so it's not so bright there you go that looks a bit better it
doesn't look so over overpowering now something else you can do when you're
using curves layers and levels as well if you don't want the overall saturation
to be affected here because you'll see for example if I turn this on and off it
has become a little bit more saturated click on normal in your blend modes and
then turn it into luminosity and you'll see that what that does very subtle
difference between luminosity and normal certainly if you look here and you watch
the saturation in the grass it doesn't look as tainted as it were so
let's that's that part what's next well again there are things you can and can't
do to this I'm kind of tempted to leave it as it is and I think probably because
the lesson is maybe dragged on just a little bit I will at the moment
and leave this particular image as it is but if I do before and after you will
see the difference between the before and the after as
to how much better it looks so if I click off there again as I said you'll
see all that nice that horrid not the nice the horrid blue color cast that was
on the image and if I click hold down alt click everything again I see it's
been calmed down a lot it looks a lot better maybe a touch of brightness could
be added into the image let's just do that it's just pushing up just a little bit
just to see I am actually affecting everything this time I am going to do a
very simple s-curve just to add it in A bit of contrast there we go and
I might actually as I said before take that to luminosity Yes, that's pretty much how I would
remember it I know I've obviously added in a bit more here again but that's okay
it has been calmed down you'll see if I click on the curves this curves here
that pretty much done what I needed it what I need it to it's being calm down
it's not so overpowering not so overpowering there you go
that's how I'm doing some of my images at the moment that I'm blending them
using a lot more Photoshop certainly than a few years ago than I was there
you go that's an image from the Dolomites and if you happen to be
interested in what it is that I'm doing how I'm doing things and want to join me
I am actually running a Dolomite's tour from the 19th to the 26th of October
2019 so it will be based in Cortina and also in another place which hasn't yet
been decided over seven days go and look on my website www.julianelliottphotography.com details
will be in the description below there you go hope you've enjoyed it
please leave any comments below there's certainly a lot more of this type of
thing to come but a lot more things that I want to do in Photoshop and Lightroom
this year to show you what it is that I'm doing in any case I'm off to Glencoe
next week probably a few things coming up from there we shall see and also a
few things coming up with a Mavic 2 Pro drone so keep your eyes peeled on my
channel a lot more to come thanks for subscribing thanks again to all my old
subscribers see you again next time


