2.5D Parallax Photo Effect Photoshop Tutorial
bhadra 0 Comments Acrobat After Effects Illustrator Indesign Light Room Photoshop Premier
Hello
everyone Chris here from Spoon Graphics back with another video tutorial. Today's guide is perfect for photography fans
and anyone who enjoys working with motion graphics. It's an interesting effect that takes a static
photograph and brings it to life with subtle movement, often referred to as 2.5D, or the
parallax effect. The effect makes use of Adobe Photoshop to
cut out an image, then uses the timeline feature to convert the still picture into a video. It works by clipping the image into different
areas, then adding subtle movement so that the foreground and background move at different
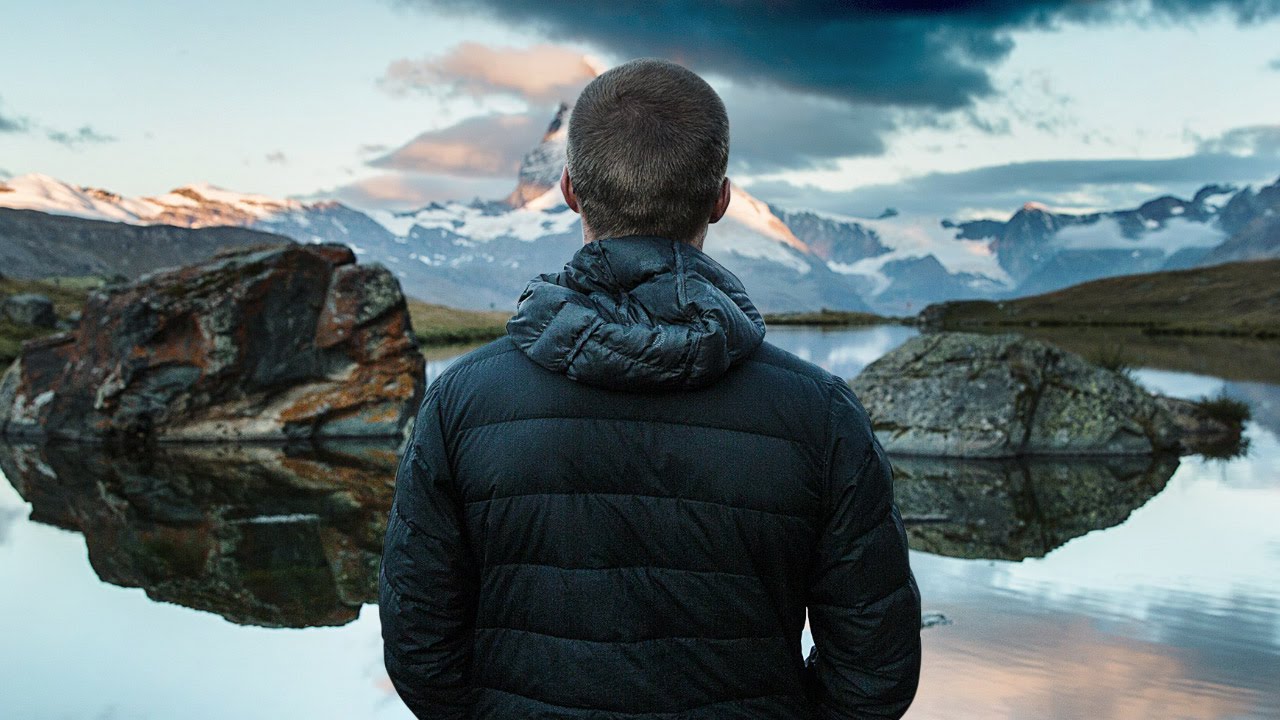
rates to create a slow motion panning effect. It works best with images where there's a
clear contrast between the subject and its background, so choose a picture that has an
obvious outline that you can trace around. Open the image in Photoshop, then select the
Pen tool and begin tracing around the main subject. Keep the path within a few pixels from the
edge to avoid accidentally capturing any slithers of background in the cut out.
When you've traced the image back to the starting
point, close the path then right click and choose Make Selection. Enter 0.5px in the feathering option to eliminate
the hard edge, then Copy and Paste the selection onto a new layer. Double click the Background layer to make
it a workable layer, then hold the CMD or CTRL key while clicking the thumbnail of the
cut out layer to load its selection. With the background layer still selected,
go to Select > Modify > Expand and enter 10px. Next, go to Edit > Fill and make sure the
option is set to Content Aware. Photoshop will automatically fill the space
the best it can to erase the original subject. Toggle off the visibility of the cut out layer
to see the result. It doesn't have to be perfect, but it will
help disguise any areas where the foreground and background become unaligned from their
original positions during the animation. Turn the visibility of the cut out layer back
on, then create a new document.
Since the final effect is exported into video
format, I'm making a 1080p document at 1920×1080 pixels. Switch back to the original document and select
both layers. Drag them into the new video document and
position them centrally. Individually select each layer and choose
Convert to Smart Object from the right click menu. This will allow us to scale the image down
and back up without affecting the quality. Next, go to the Window menu and select Timeline. Make sure the option is set to Create Video
Timeline rather than Create Frame Animation, then click the button. Click the little drop down arrow for the first
layer in the timeline and click the little stopwatch icon to set a keyframe under the
Transform option. Press the CMD+T shortcut to Transform, then
hold Shift and scale the background to fill the majority of the canvas.
Move the playhead to the end of the timeline,
then click the little keyframe icon to set a new position. Transform the background again and scale it
up slightly. Photoshop will automatically animate the size
between the two keyframes for the duration of the timeline. Repeat the process with the other layer that
contains the main subject. Add a Transform keyframe at the start and
end of the timeline and adjust the size of the layer. This time scale the subject in the opposite
direction, so go from large to small to intensify the parallax effect. Scrub the playhead back to the beginning then
press the Play icon to see the effect. The first time it plays it might be a little
jumpy until it renders the timeline, but the second time should play through smoothly. The result is a cool subtle animation where
the foreground and background move at different rates to create a parallax effect.
The final video can be exported by heading
to File > Export > Render Video. Set the filename and change the preset to
YouTube HD 1080p, which should be available if you have Adobe Media Encoder installed
as part of Premiere or After Effects from the full Adobe CC suite. This parallax effect also works great with
landscape images where there's clear definition between the horizon and sky. It works exceptionally well if the foreground,
middleground and background can be separated and moved independently. In this next example I'm creating a clipping
of the ridgeline and creating a timeline of the mountains in the foreground against the
northern lights in the sky. A subtle scale on the mountains layer against
some slight rotation of the sky creates a cool effect when the animation is played through. The trick is to adjust the keyframes just
enough so they produce some subtle motion.
You can always move the timeline playhead
back over a keyframe and readjust the transformation, or you can switch the keyframes around so
the transformation plays in the opposite direction. In this next example, I'm creating a cut out
of a snowboarder from the background. The content aware fill left some unwanted
areas, so they were cleaned up with the Clone Stamp tool. This time, I added a couple of extra snow
effect layers. This exact snow overlay effect product is
available to Access All Areas members on my Spoon Graphics website, but the effect itself
can be easily created by manually dabbing a bunch of white splodges with a brush and
adding some subtle blurring. A video timeline was created for all the layers,
then each section was animated independently by adjusting the size and position.
The addition of the snow layers helps intensify
the parallax effect and creates more of a cool slow motion video, disguising the fact
that it all began as a still image. So I hope you have some fun with this parallax
effect to bring your own photographs to life. It provides a cool new way to experience your
shots in a kind of pseudo video format, as opposed to basic stills in the slideshow.
If you enjoyed the tutorial or learnt any
new tips, a thumbs up to help spread the word would be really appreciated. Don't forget to subscribe to the Spoon Graphics
YouTube channel if you're new, or you can head over to my Spoon Graphics website to
find plenty more tutorials along with free design resources. So as always thank you very much for watching
and I'll see you in the next one..


