Color Matching in Photoshop: Fast and Easy Method – 90-Second Tip #05
bhadra 0 Comments Acrobat After Effects Illustrator Indesign Light Room Photoshop Premier
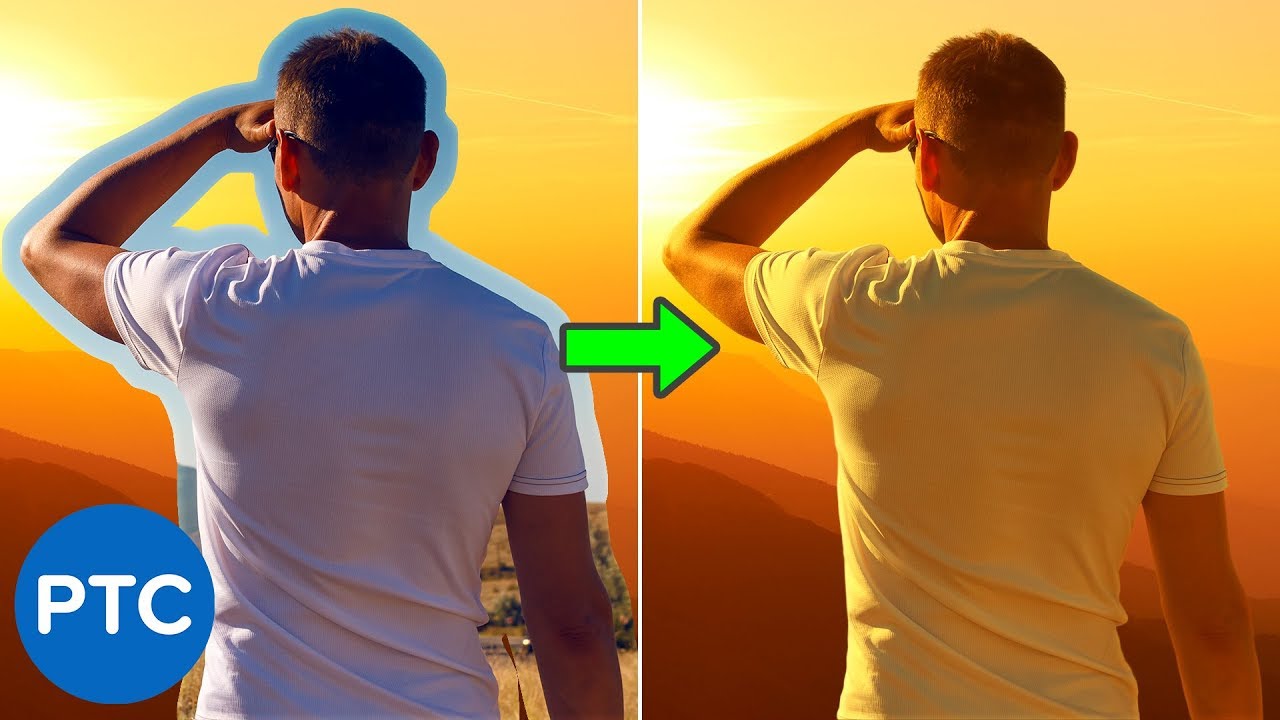
Hi! Welcome back to the Photoshop Training Channel, I'm Jesus Ramirez. In this 90-second Photoshop tip, I'm going to show you how to quickly
color match images in Photoshop. We're going to work with this composite. It has two layers, this background layer and this foreground layer. I've already extracted the foreground
from the background. Start by creating a Curves Adjustment Layer. Then press Ctrl Alt G,
Command Option G on the Mac to make a Clipping Mask, so that the adjustments
only affect the model. Make sure that the focus, the white outline
is on the Layer thumbnail and not the Layer Mask.
Then hold Alt Option on the Mac, and click on the Auto Button. Select Find Dark & Light Colors,
and uncheck "Snap Neutral Midtones." Then click on the Shadows,
and select the darkest point in the background. Then click on the Highlights and select the brightest point
in the background. By the way, pure white and pure black
will not work for these. Then Press OK, and press No. In most cases, you do not want
to save these colors as default. Then you can fine-tune the curve
to create a better match. I'm going to create a few points
and add more contrast. And now the foreground
matches the background and it was really easy to do. If you like this technique,
click that Like button, and let me know in the comments
if you plan on using it. If you want to learn more about
making realistic composites, Then check out my full-length tutorial on
blending images together.

I'll place a link right below in the description. Also, don't forget to watch my all previous
90-second Photoshop tips. Including my popular sky-replacement technique. I'll also place a link down below Let me know if you like these short tutorials
or if you prefer the longer ones. Also, if this your first time on the
Photoshop Training Channel, Then don't forget to click on that
Subscribe and Notification buttons. Thank you so much for watching! And I will see you at the next tutorial!.


