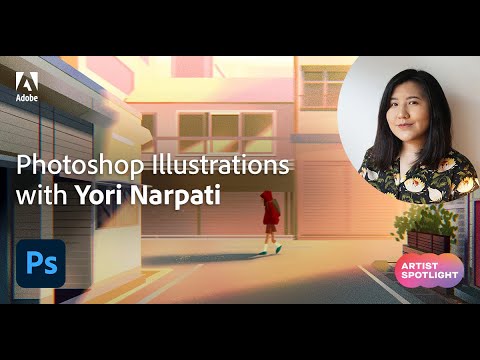
Mastering Illustrations on Adobe Photoshop with Yori Naparti
bhadra 0 Comments Acrobat After Effects Illustrator Indesign Light Room Photoshop Premier
Hi, everyone, my name is Yori Narpati, and I am a freelance concept artist and illustrator from Indonesia, and today I'll be showing
you some of my favourite tips and tricks that I used to do
these kinds of illustrations in Adobe Photoshop. (light music) So I've actually used Photoshop
for the past 10 years now. It was the first program that I picked up when I first started learning and it's still the main
program that I use today to do most of my work.
I find that the user interface
to be very easy to understand and very easy to pick up if you've never used any
Adobe products before. Another added benefit
to using Adobe Photoshop is that it integrates well
with other CC products, such as After Effects to do compositing and Premiere Pro to do video editing. So without further ado, I'm going to show you
my favourite basic tips to create these illustrations more efficiently in Adobe Photoshop. Here we go. 01 Perspective Guidelines Okay, so the first tip I want to show you is how to do perspective
guidelines in Photoshop. It's a really simple tool,
but it's really helpful when you're trying to do
perspective drawings in Photoshop. So you go to your toolbar and you select the Polygon Tool, this one. You go up here and make
sure that the properties is on Shape. Change it to no fill
and stroke by one point. And then you go to these Path Options and make sure to select Star, and indent sides by 99%,
that's really important.
Also go to Sides and go 100. And when you're done doing that, you can do a new layer
and just click and drag. As you can see it's made it a lot easier for me to draw in
perspective in this drawing and you can also apply
this to 2 point perspective and 3 point perspective as well. 02 Blocking Colours You can always just, of course,
you can just freehand a line and it'll be somewhat straight, but it won't be perfect every time. So what I do is that I just press Shift and draw a line in
whatever direction I want and it'll just automatically
create a perfect straight line.
Another way you can do that
is by clicking in one spot pressing Shift and then
clicking in another spot and it'll just automatically
create a perfect line like so, and then you can just fill that shape up. Another way to block out
colours in Adobe Photoshop is to use the Lasso Tool. In this case I'm using
the Polygonal Lasso Tool and as you can see in the timelapse video, it's made it a lot easier
for me to just block out huge blocks of colours in my image. 03 Locking Transparent
Pixels & Clipping Mask If I want to do a quick
shading on this image, after I pick out my colour
and pick out a brush size, I can just quickly do a very big stroke and it'll keep it within that shape. So what you want to do is
make sure that this symbol right here in the layers tab is clicked.

Another one that I want to show you is how to do clipping mask. So I've done a bunch of
highlights in this image, but they're all bleeding
out of this shape. Now what I can do is I can
just press alt on my keyboard and then hover in between this layer and this folder that I want to clip it to. And once I do that, and
you can also stack them. And once I do that it'll
keep it within the shape. 04 Custom Brushes So what I'm going to do now is, I'm going to select my Lasso Tool and create a very simple leaf shape. And once I'm done with that,
I'm going to fill it up with black, that's very
important to do black.
Select the shape and go to
Edit and Define Brush Preset. You can rename it if you'd like. Once I'm done doing that,
I go to my brush settings and go to Brush Tip Shape
and increase the spacing, check Scattering, Shape Dynamics, and make sure you change
the Control to Pen Pressure. You can just adjust these as you go and see what kind of effect that you like. This all depends on what kind
of image you're trying to do. In this case, I'm trying
to make a foliage, like a scattering foliage, so that's what I'm trying to do here. I'm just testing it as I go and adjusting the settings
until I like how it looks, flipping the X and Y jitter and adding in Colour Dynamics
'cause that also helps. And once I'm happy with the results I can just add it in to my image. 05 Blur and Noise So for example, I want to blur this
background image right here.
I'm just going to duplicate,
and what I like to do is, I always like to have a copy of the layers but here's the merged version
of the image, of that layer. And then I go to Filter and then Blur, and then some of the
blur that I like to use is Gaussian Blur and Motion Blur. Going to use Motion Blur for this one. You can adjust the angle, and I usually like to
use just a little bit, just to suggest some depth in the image. And once I'm happy with that,
I'm just going to OK it. And then another thing
that I like to do is, I like to add in Noise. Just adding a little bit of texture, I can just create a new layer and fill it in with just a grey colour. And then I go to Filter, and
then Noise, and then Add Noise.
You can check or uncheck this box depending on what you want, but I want it to be monochromatic, so I'm going to check that box. And you can change the amount
of noise that you want. You want it to be very subtle, so I usually just go for about this much. And once I'm happy with
that, I'm just going to OK it and you can change the
layer blending style here, and just look for the one that looks best with your current image. So with this particular image I think it looks best with Divide. So I'm just going to select that and go to my Eraser Tool and just erase parts that I don't want. So that's the end of the video. I hope that was somewhat
helpful for some of you, and I hope you try these in
your own projects at home. And thank you so much
for watching this video. I'll see you later, buh-bye..


