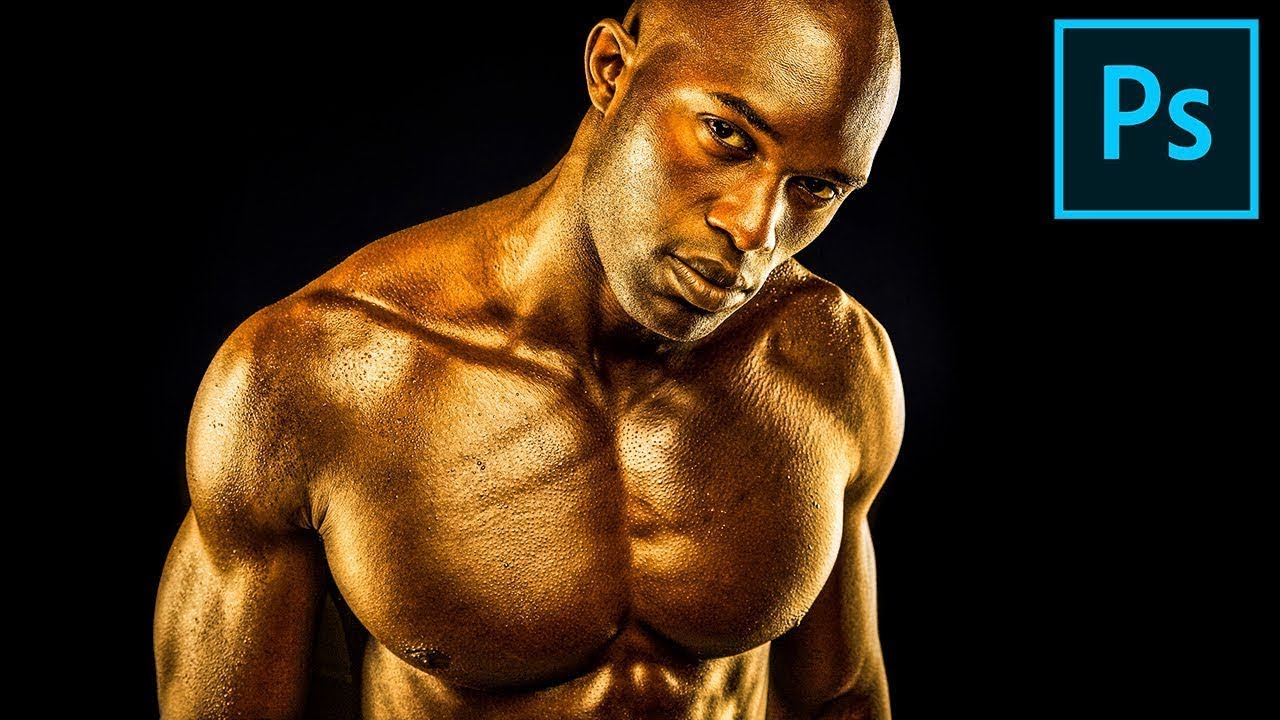
1-Minute Photoshop – Create The PURE GOLD Skin!
bhadra 0 Comments Acrobat After Effects Illustrator Indesign Light Room Photoshop Premier
Today we're going to learn how to get the
Golden Skin Effect in Photoshop in Just One Minute So, first of all, press Ctrl/Comand + J. Make
a copy of the Background Layer. Then, go to Filter > Camera Raw Filter. Now, the only slider that makes it happen
is the Temperature. So just increase it, and there you have
the Gold! Now, you can enhance it, by decreasing the
Highlights a little bit, to have more details in the Highlights. Maybe increase the Whites, to increase more
shine to it. And, here's the grunge, the Clarity. Let's increase it. Wow! It looks awesome, doesn't it? You can also try playing with Dehaze.
It looks more awesome. But the thing is, it's becoming too bright. So, let's decrease the Exposure. Even more awesome! Maybe let's just increase the Shadows. And, play with the blacks, just like that. I'm satisfied, just hit OK. It also affects the background. So, all we have to do, hold the Alt/Option. Click on the Mask Button. And then, take the Brush, make sure the Foreground
Color is White, and paint on him, just like that So, that's how to create the awesome Golden
Skin Effect in Photoshop!.


