Logo Design Tutorial | Adobe Photoshop/Illustrator | Mastering Vintage | Part 1
bhadra 0 Comments Acrobat After Effects Illustrator Indesign Light Room Photoshop Premier
hey guys welcome back to another episode of
creative process and today's video we'll look at how you can create vintage logo design using
photoshop and illustrator in a previous video we have seen how you can create oldest vintage local
design in the illustrator we have used opposite part option and a blending option to create
that effect in this tutorial we'll be creating out couple of vintage local design and we'll
understand all the necessary steps you need to know to create out a classic vintage logo design
so the first step we're gonna do is to convert all our images into path objects in photoshop
after that we'll export those parts object to illustrator and convert them into vectors once
the vectors are ready we are ready to design our vintage logo design so let's begin with the
designing process so over here if you look at it these are all the path objects which we have
extracted from the images in photoshop if you zoom it in you can see all the necessary details you
need to like this and after that what we did over here is we jump to illustrator and we have convert
them into vectors like these so here these are all the vector objects which we have extracted from
an image so we'll understand how you can extract a vector how can we convert an image into vector
just like this and use it to create any design you want so let's understand this so if i open my
folder you can see all the images i have used in this design there are five images
so here it is the five images so uh what we'll do is we'll x import this images in
photoshop and convert them into path objects we'll begin with this so over here if i open photoshop
let's create a new document so go to file new and here let's set the document size so we'll
keep the document size around 2000 by 2000 and keeping the resolution on 300 maybe you can
keep it to less let's say we'll keep it around let's say 72 let's check it out what happens
okay so we have given to the 2000 by 2000 and the resolution around 72 and create so here is a new
document before we go further what these images i have downloaded from the web these are png
images that means they don't have background if i break this you can see these are all individual
images without the background but over here we got images for the background so we can remove it
in photoshop very easily so i'll just import this and drag and drop it to photoshop so here is our
image i will just scale this up a little bit so in photoshop you can just scale it up and it will
scale in proportion so you don't need to press any shortcut to scale up proportionally so here's our
image as you can see it's metal and what we need over here is we need to get something like this
so to get something like that we're going to do is we'll go to layer first and let's convert
it into rasterize so i'll convert them into rasterize layer so here is our image which isn't
now rasterized now the first step we'll do is we'll add a little bit of sharpness to this image
as you can see there's no sharpness over here so i'll go to filter and sharpen and smart sharp
and here we'll do some adjustments so uh i'll increase this amount to around let's say 250
and radius around let's say three and this noise around 30.
Okay let's see how much sharpness it
as you can see i have increased the sharpness to the image and you can see over there so i'll
just click ok and this is our first step adding a little sharpness now the next step is to like add
a threshold so i'll go over here in this and here just go down and click threshold so threshold will
it will give you this black and white effect so if you etched the threshold value you can see
you can add or subtract the darkness so here what we need to do is we need to add that like
how much you want to give shade and brightness so over here we need something like this but if you
compare with our images we got lots of detail over here so what you need to do is we'll first set how
much darkness you want to give so let's say you want to give this much of darkness now let's add
those details and to do that we'll go to layer and let's select that image again and now again we'll
apply sharpen smart sharpen and here we'll add a little bit of values over here so if i increase
the amount over here it will add sharpness and that sharpness will add details to your design
so how much details you want to give you can adjust it over here like reducing the sharpness
will reduce the amount of details in the image and with the radius value you can add more details
like if i increase the radius you'll be able to see much more details in your images so as you can
see we got lots of details but i'll keep it around this much and i'll just adjust these three sliders
just to get something like this like you want all small uh details as well and i'll increase
this as well just to see okay so as you can see i have as i increase the amount to too much you can
see there are lots of patches lots of details but it's looking very odd so we'll reduce it around
this much and i'll just keep it around this much and let's preview it again if i reduce this radius
value you can see it clears up those details so let's adjust the radius value around let's say
three again and let's see so these are all the small details and all the necessary patches
over here so what we did over here is we adjust these uh three sliders amount noise and the
reduced noise so we have set it around medium this is around 300 this is around three and this
we have edited around four to fifty percent just to reduce some noise in your design and now
if i click okay here is our patch and now we can again go to a threshold and just reduce the shade
value over here and this will like um add those like tiny tiny details in this and if you compare
it over here as you can see we got those over here as well so this is how i have added these uh like
tiny tiny shapes in between looking like a vector shape so this way and once you are done with your
threshold value just leave it and after that we'll go to layer and now what we'll do is we'll create
a new layer so press command alt shift and e and this will create out a new layer of the image
so this is single image the single layer with the image so now we'll work on this so what we'll do
is we'll go to select color range and we'll we are using color range to select only these are the
dark portions so what we'll do is go over here and collect shadow maybe it might be highlight in your
case so remember to shadow and just to see this and here will adjust the value so if you increase
the fuzziness value it will sharpen your like details and if you reduce it it will soften it a
little bit so let's just keep it hundred arrange to 0 and click ok and this has selected that black
portion now i'll add a new layer on top or maybe i just apply mask to this first so we already saved
that selection now with the control or command press click on thumbnail this will make that
selection add a new layer and now using this tool right click on this and make work path and this
will convert this into workbot we'll click ok and here we go we have created that path object
of the like helmet this is the helmet now we'll apply the color so to apply it go over here click
solid color and here choose some any color black and here we go our design is ready and to
deselect the path i'll go to path layer and just click on the empty surface and here
is our image and with the selection tool you can just move it all around and to change
the color you can just double click on this and just add a little bluish tint to it i'll
just unhide this background there and here we go this is our first design we have extracted it
from the image and now our path object is ready this way we're going to extract out all these
images let's say you want to extract this so i'll just import this one as well over here and
press enter i'll just hide this on so i'll just scale this up a little bit scale this up and enter
now let's uh do the follow the same steps as we did in our first image so what we did over here is
we convert this into rasterize layer and now let's add that sharpness so i'll go to filter sharpen
and smart sharpen and as you can see our images is little blur so by adding a little sharpness to
it we are giving those details to these images so we have given around 300 and this three and this
around 30.
And this has added that sharpness to our image now let's add the threshold layer
so i'll go over here and add a threshold there and this will convert that into black and white
and here you can adjust the range so let's give it something and as you can see if i increase the
lightness we are missing some details in our face so what i need is we'll keep it something little
darker just to see all the overall details over here and we'll go back to the layer again and play
around with the sharpness values so filter sharpen and smart sharpen and here we'll now again do the
adjustment with the sharpness value so as you can see by adding these value again it has already
reduced that darkness and added more details but let's reduce the details a little bit so we
can add some like brightness around here or here as well so i'll just reduce the radius as well uh
these settings are going to be different for each and every images so we have to know what are we
looking for i'm making sure that i'm getting all these details as well as the dark region is also
there so that i can use the threshold to remove those darkness and i'll just increase this value
and i think uh this much setting is good for this image just click ok and now i'll just go to double
click on the threshold and that's brightens up so if i increase the brightness you can see we got
that darkness here and as well as we got all the necessary details so if you want to remove it
you can remove it and here we go we got all this necessary to use we can make it lighter or darker
it's your choice so we'll keep it around like this and now i think this is good so what i'll do is
i'll go to layer again and we'll follow the same steps we will create a single layer image and to
do that press the shortcuts command alt shift and e and this will create a new layer i'll just
hide all these background layer and as you can see this is a single image layer now let's work
on this we'll make a selection so go to select and color range and it will pick that uh like
shadow region i will just adjust these value for example if you see that the selection is
very harsh you can use this fuzziness slider to reduce it just to make a little bit softer darker
softer so i'll just keep it around 60 and click ok and this has selection this has make that
selection now we'll apply the mask and our selection is saved now with the command pressed
click on thumbnail and just make the selection add a new layer and we'll select the selection
tool like this any selection tool rectangular marker tool anything and right click on this and
make work path and then set the pixel to 2 pixel and then click ok and this will convert this
into path object and here is our path object now let's apply the color and to do that we'll
follow the same steps go over here and apply solid color let's choose something bluestone as well
and click ok and here is our path object with the applied color i'll just hide this secondary layer
and this is our image and deselect that path so i'll just go over there and click on the empty
space just to deselect and go back to a layer and here we go we have converted this into path
object now and i'll just unhide the previous design i'll just place it and scale down so it's
very easy to scale just uh command or ctrl t and you got that and scale it down with your alt
and shift rest and i'll just keep it around here and i'll just scale this down as well come on ctrl
t and just scale down with the shift pressed i'll place it on here enter and now we have converted
two images into a path object now let's uh do the same for the rest of the images i like
this car classic car so let's uh drag and drop it over here and enter i'll just hide these rest
of the layers and let's work on this first thing convert this into rasterize layer okay and let's
apply the sharpness so i'll go to filter sharpen and smash sharpen and the steps are very easy to
follow once you know it it's become very easy and first step is around 300 and this 3 around 30 and
click ok and this will add that little sharpness to your image this will make it easier to apply
this threshold that's why we're giving that first sharpness value so now if i apply the threshold
value over here we can easily see the effect i'll just reduce it like this as you can see and
i'll go to again layer and just bring in that background layer and just play around with this
how much details you want to give to your car you can do that so i'll just keep it a little
darker and we'll go to layer again and select the image and we'll again go to filter sharpen
uh smart sharpen and we'll add a little bit of this amount so this will add that more details
over here as you can see if we zoom it in you can see it has added those details if you remove the
preview you can see this was the original image and now by adding sharpness you can add more
details so now if you want to reduce it you can just reuse the radius slider to reduce the amount
of details you want to image and if you want to give more details you can just increase the
radius value and it will add more details to your image so here we go and i think this is looking
great so i'll keep it click okay and now we'll convert this image into single layer so i'll just
select the top layer then command or shift and e and here is our image we'll just hide out all
the secondary layers and this is a single image now let's make the selection select color range
make a selection so i'll keep it sharp and click ok and now apply mask to it with the command or
control press click on thumbnail make a selection add a new layer then make select this marker
tool and then right click and then make work path and this has convert this into path object
now to apply the color go over here so add color and apply something any color you want and click
ok and here is our third image we have convert this into path object i'll go to path click
on the empty space and go again and selecting this to scale it down command ctrl t and with the
shape press just scale it down keep it around here and we'll hide out all these down there and here
we go here is a second and here's our first one so just scale this up a little bit the car is
ready next is ship and this all so let's look at this how you can convert that and as you can see
as we have done three of the images you might be noticing that every time there is some adjustment
in the slider so we have to do that because each time the brightness and the contrast of the image
is different so you have to look at the image and understand and then do this adjustment and then
export it so for this uh shape image we are again going to look at that so the initial step is all
similar so the initial tab is converting into rasterize image right and then go to filter and
add a sharpness so this is the initial step which is common for all the images so 303 and 30.
That's
the same thing just to add the initial sharpness and the next step is quite different because
we have to do the adjustments individually so now we have added that thresher value right so
add that threshold value and now just adjust the slider and before we go further i'll just hide
out all these background this one except this add a background shape like that and now we'll
do the adjustment in the threshold so just do it and as you can see as i lower the value we
can see more details so i want you those details in this image so we want something like this right
i'll keep it something like this around 75 and now we'll add more details using the smart sharpness
option so i'll go to layer back again and selecting that layer go to filter sharpen and
smash sharpen so as you can see it's the same step now here uh the value might differ so uh i'll just
play around with this as you can see it has added that more details i'll just reduce the value to
bit just to reduce those details and if i increase the radius we got more details in our like
image so i'll just keep it around let's say 11 and i think ever everything else is fine
so just click ok and here we go the ship is also quite looking great now uh let's use
the eraser tool just erase this out because we don't need this extra pieces over here so now
let's create a single layer shortcut is alt share command and e press altogether and this will
form a new layer now make a selection color range okay same thing click ok apply mask command
press click on thumbnail add a new layer and the steps has become very simpler as we are doing it
repeatedly and now i'll ask make a selection like that and right click and this make work path click
ok and object is ready let's apply the solid color and let's choose any color dark color and click
ok and now i'll go to path and just click on it and here we go our fourth object is also ready
i'll just reduce the size come on ctrl t reduce the size around this much and enter so four stuff
already only the last piece is remaining this owl so i'll just drag it over here and so this is
how you can convert any image make sure that the background is like white or like transparent
because you don't need those background objects so make sure your image doesn't have that background
but if it is you need to first remove all of them just leaving only the object you want and
then follow this step and you can create path object very easily in photoshop and the
next step we're gonna export that and import in illustrator and convert them into vector
so it's very easy very simple so let's finish this final image and let's jump to that step
where we'll be converting them into vectors so here is our image i'll just hide all the
rest of the image layers and now scale this up just to make it a little bit bigger right click
rasterize layer filter sharpness smart sharpness around 300 this is around three and this is around
30 and click ok then we have added the sharpness now add a threshold layer click on it and let's
increase the darkness a little bit just to make sure we got all the details around the eyes and
all because if you keep it something like this you're missing all the details so for this image
as you can see i'm giving a large value so we have to give that just to see all these details and
once you have covered all your details like this now let's add those tiny details using the
sharpness option so i'll go to the image and let's go over here filter sharpen smart sharpen so this
smart sharpen option become very handy to add more details as you can see just adding that option
simple just adding that option has given that more details now if you want to add more only
reuse it it's on you using the slider so let's do that so here the amount is 300 as you can see
by increasing the amount of 300 has given more details so if i reduce it let's see what happens
the details are reduced so we need more details i'll just keep it around let's say 469 470 just
to add more details like this and now i'll use the radius slider just to adjust few more settings
so if i increase the radius you see the details become little bigger so right now it's become
very big so i'll just reduce a few percent so around let's say 11 and let's check it out how it
looks it's more little detailed i want to keep it a little bit smaller so i'll just keep it around
let's say nine yep i think nine one is better by adding a little bit of noise value increasing
it you can see the image become little clearer so i'll just click okay now i think this is looking
great and now we're using the threshold slider i'll just make it a little lighter so here we
go by doing that now you have added that little lightness and i think this is looking great and
now if you want to do more adjustments like if you see our original image i did some adjustment with
the eye and what i did over here is i just use the a brush and like eraser tool just to make that
so what we'll do is we'll just keep it like this now i'll just create a new layer make sure you're
selecting the top layer and then applying that if command or shift and e so here is our image
i'll just hide out all these background layers and now make a selection select color range
okay keeping it hundred by zero and click ok and boom applying mask and here you can do
some adjustment so i'll use the brush tool and select color black and let's try to apply
it so as you can see with the black i can erase so i'll just make it hard round brush and
just make that eyeball shape over here i'll do it the same over here as well says to
just erasing out the surrounding portion so here's our eye and now with the command press
click on this thumbnail and now add a new layer then select the marker tool right click and make
work path click ok let's apply the solid color and let's see how it looks i did some adjustment with
the eye so i just hide this and deselect the path here we go this is the all we have created
let's kill this down a little bit and let's unhide all these shapes these are all the
path object we have created from the images so the first one was helmet second deer car shape
and you can see everything is scalable and they are path object now the next step we're gonna
do is to export this path object to illustrator and for that let's open illustrator and here
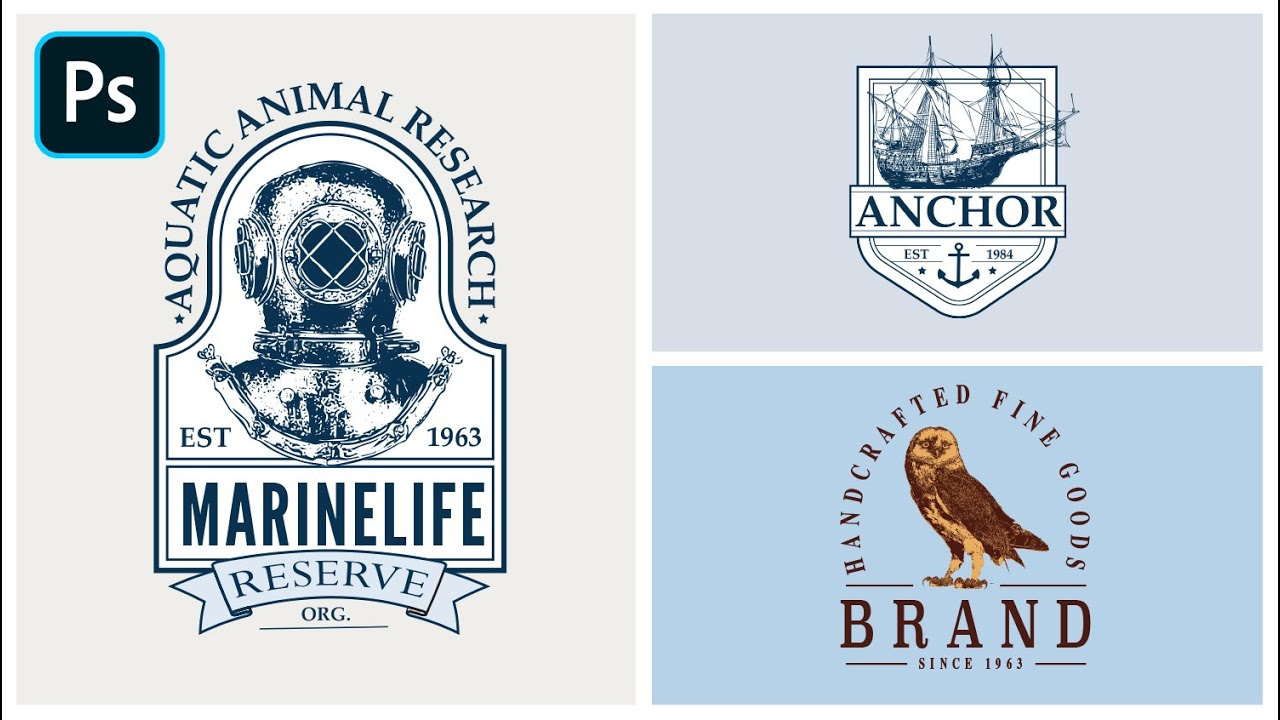
is our illustrator and as you can see this is the final design we will be working on we'll be
creating so each object is going to give you this amazing looking design so let's bring in that
helmet so what i'll do is i'll go to photoshop so now to export it i'll just select this image so
here this is the helmet layer if you select that and now to export file export and if you slide
down you can see path to illustrator so so this will export this uh path object into illustrator
first so as you can see this is selected color fill one shape path here is name and click ok and
now let's choose a destination we'll keep it here inside resource image name it helmet pretty helmet
okay and click ok let's do the same for the rest of the image so i'll just select this deer fill to
okay file export part 2 illustrator and click ok and we'll keep it d e e rdo and click ok this
will save it let's select car file export part to illustrator and name it car save then
ship part illustrator okay name it ship save lastly now also select add go to file
export and file path of illustrator okay o w l and here we go we have saved all the uh path
object in the form of illustrator and if i open that folder here is all the illustrator file card
have and these are now in vector shapes and now if i import any of this in illustrator it will open
it very easily let's say you want to import it so here is illustrator document and let's import
our first vector so for our first design we need the helmet so i'll just drag and drop the helmet
over here so here's the helmet drag and drop and this will ask you this legacy artboard upper
bounding we just uncheck these and keeping only this crop area and click ok and this will open it
in new document so here it is and as you can see it's blank because it doesn't uh include the color
so what i will do is select everything like this and here's a helmet let's apply a color so i'll
just apply some let's say black color and now as you can see we don't have those details we are
missing those details but if you select over here you can see all those details are converted into
smaller objects this is the main and on top of it you got all these small details so what you need
to do is select everything go to pathfinder and click on this exclude so this will exclude the
top shape from our main object just click on it and here we go the top small pieces shapes has
been excluded from that main object and this is the output we got so if you check it over here in
photoshop here it is this is the same thing which we exported from our photoshop file and this is
vector completely vector everything is editable and now let's import the rest of it so i'll just
drag and drop it to a file just to work on it so here it is just scale it down and we'll place it
around here okay and this way i'll just import all the rest of the vectors so let's import it so
here car open it in illustrator and just click ok and everything will open in a new file just click
and drag and select them and then apply any color and then go to pathfinder over here and just click
on this exclude option and just apply the color and here we go our car file is also here now just
drag and drop it and place it over here just scale it down and here we go let's bring in the three of
the shapes over here i'll just open there owl and ship so open it okay so i'm opening all the three
at one everything will open in different file and here if you go to the file i'll just select
everything this is a dio let's apply some color let's say black and as you can see it's the same
here you're missing some details the best thing to get that details is selecting everything and go
to pathfinder and click on exclude exclude will exclude all the tiny details over there and you
got those details do the same for the owl select and then apply color black okay once you apply the
black color you can see you are missing all the details just select them all you got all these
necessary tools we'll just exclude that out so go to pathfinder and click on exclude option and
just apply the black color and here we go and the last shape just click and drag just to select the
shape apply the color okay and now go over here and exclude and here we go we got that shape
just select and drag and drop it to our main file so here's our shape scale down the size and here
we go let's bring in our all here select them bring it over here and place it over here scale
down the size and here we go next last deal select drag and drop it over here scale down the size and
place it over here so the second step is also done the first step was to convert the image into path
object in photoshop the second step was to export those path object from photoshop to illustrator
and convert them into vectors and as you can see all our shapes are in vectors so all our images
have been converted into vector shapes let's apply some single color like this just to make sure
that it blends with our design and as you can see we're having that blend it's looking great this
this and each tiny details are in vector shapes you


