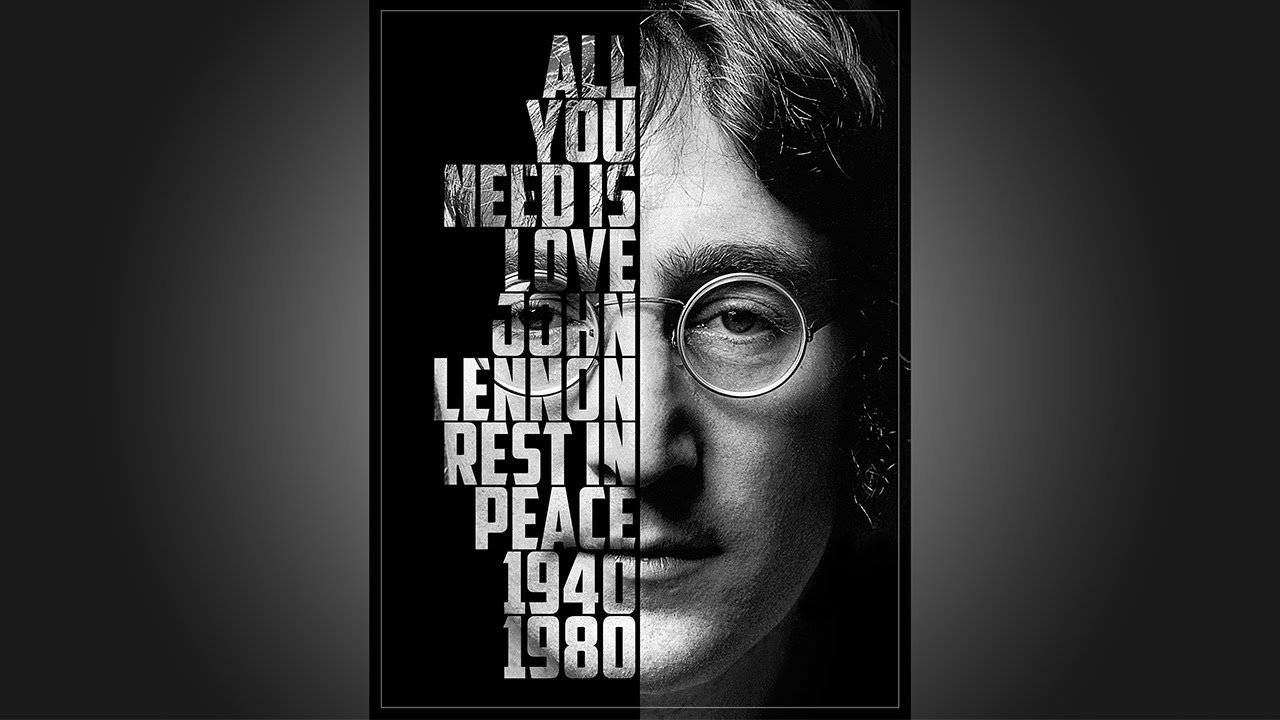
Photoshop Tutorial: How to Create a Powerful, Text Portrait Poster
bhadra 0 Comments Acrobat After Effects Illustrator Indesign Light Room Photoshop Premier
Hi. This is Marty from Blue Lightning Channel … I'm going to show you how to make a strong, typical image Artistic poster of someone from a picture Open a picture of the person you want to use in the project The result will look better when the character's voice is pointed directly at the camera This image can be color or black and white. If it is colored, it can be treated with Ctrl or Cmd + Shift + U.
We will define the topic in order to separate it About the background. Which method you choose to make the choice should depend on the characteristics from your picture. For example, I'll use the Quick Selection Tool. If you are using This tool, too, must depend on the size and accuracy of the document You can either drag a tool in or out of the thread.
For example, I'll select outside. To remove selection areas, press and hold Alt or Option as you drag on those areas. Invert selection from those areas. Pressing Ctrl or Cmd + Shift + I. Click on the Refine Edge button or go to Define and Select an Edge. I did an in-depth tutorial on fixing the edge And I provided a link in the video description. We're going to brush around the hair.
To change the size Your brush, you can use the slider. Check smart radius and increase the radius slightly. Pull around the hair And output as a new layer with a layer mask. Then click OK. Hair couldn't be perfect. I'll take care of the edges in a minute. Make a new document by pressing Cmd + N Let's call it "Poster". Then change pixel to inch and make width And height is whatever you want. I'll make it: 16 inches long and 12 inches wide Make the clarity 300 pixels if you want to print it at the end We will make black the background color. If you are not working on the latest version of Photoshop I'll show you how to make it black in a minute. If you are working on the latest version Open background contents. Choose "Other" and choose black.
Then, click OK on both Windows. If you are working on an earlier version, click "ok" in the new document window Then press "D" to make your foreground and background colors black and white, respectively. Since your foreground color is black, hit Alt or Option + Delete To fill the background with black color. To make it fit your work area press ctrl + 0 Open the face slide and drag the image up towards the portrait strip Without leaving the mouse or the pen Hold shift while dragging it down towards the background, then release (release).
Pressing shift Make it centered in the background. To resize it, open the Transform tool by pressing Ctrl + T Or cmd + t for MacBook. Go to an angle and when you see a slanted double arrow, press and hold Alt Or + shift while you drag it out or in. To change its location, go inside the image And pull it. Continue until the face is centered and filling the slide. After that press enter Or return. To adjust brightness and face difference, open the Levels window by pressing ctrl or cmd + L. Adjust the input levels until the shadows are pure black and And the lighter parts are bright enough. After that, click OK Next we will merge the edges of the hair with the background Click on the Layer Mask to activate it and open the Brush Tool Click on the brush picker We'll manage to measure the brush in a while Set the hardness 0% and opacity and flow 100%. To make your brush bigger or smaller, press the left or right arc button on the keyboard Hover over the area that you want to blend in better Doing so will bring up more black background through the layer slide We'll eventually put our text on the bright side It is in this case the left side If the light is distributed over your subject evenly, you can place the text on either side Go to view and make sure that the check mark is placed on both the rulers and snap If they are not, just click on them Go to the ruler on the left side and drag the guide line to the center of the slide It will settle in the specified position because we have the snap selector mode If you don't see the guide line press h + ctrl or cmd + h Open the Rectangular Marquee Tool Go to the top corner of the side of the face that has less shadow Drag a precisely over the half of the slide making sure it snaps onto the center of the guide line Click on the New Layer icon to create a new layer In this blank layer, we will fill the selection with black Assuming the foreground color is black, press Alt or option + delete To deselect, press Ctrl + D or cmd + d To hide the guide line, press Ctrl + H or cmd + h We are now ready to add a line Open the Horizontal Type tool Open your font list And choose the heavy san-serif font.
I use the American Captain Regular font if you like Using this font, I've provided its link in the video's description box Size between 50 and 100 and make it sharp. If the text is on the left side of the image Click on the "Align Right" icon, if your text will be on the right side of the Your picture, click on the "Align Left" icon, click on the color box and choose white Position the cursor near the top of the middle of the slide And write the first two lines of your text To set the leading, also known as leading Go to the window icon and choose a character from it The Character Panel will open Select your text and drag the main slider left or right Keep the leading tight, click Next next to the last letter of the second line And keep writing the rest of the text Open the move tool and go to the view icon and click on snap from the icon to disable it Drag the rest of the text to make it nearly touching Black background edge.
To resize, open the transform tool Move to the bottom outer corner, then click and hold Shift while you drag it out After that, click enter or return Ctrl-click or cmd-click on the T-tab of your text layer to make a selection for The shape of your text. Click on the eyeball next to the layer to hide the text Activate the black theme Click the delete button to remove the area inside Selection. Then deselect it, press ctrl + d to deselect it If there are sites that are difficult to read in the image, I'll show you how to make the words clearer Make the face layer enabled And open the dodge tool Open the tool picker.
We'll take care of the size in a moment make the hardness %, Exposure: 100% and make sure protect tones have a check mark And adjust your tool size. Now, hover over the areas you want to lighten This time set the range midtones and hover over the same areas Open your brush tool And reduce the opacity to 10%. Repeat hovering over these words Keep using the dodge and brush tool until the words are easier to read Next, we'll add a thin stroke to the shape The edge of the image.
Activate Layer Number One and click on the New Layer icon to create New layer above it. Fill it with any color, I'll fill it with foreground color which is white Lower the Fill opacity to 0%, this makes all of the layer fills invisible But any effect we add will still be visible. Double click on the layer To open the Layer Style window. Click on the inner glow, change its blend mode to normal, and set its opacity to 40%. And for the choke 100% I'll make the size 70 pixels, but you may want to adjust This amount depends on the size and resolution of your image Click on stroke and set volume Between 2-4 pixels less than the amount I used for the inner glow. Make the spot inside Change the blend mode to Lighten, then click OK This is Marty from Blue Lightning TV Thanks for watching 🙂 Translated by Fatima Omar.
Posted in Acrobat, After Effects, Illustrator, Indesign, Light Room, Photoshop, Premier


